Paper Hanging
Description
This section is from the book "A Treatise On Architecture And Building Construction Vol4: Plumbing And Gas-Fitting, Heating And Ventilation, Painting And Decorating, Estimating And Calculating Quantities", by The Colliery Engineer Co. Also available from Amazon: A Treatise On Architecture And Building Construction.
Paper Hanging
165. The art of paper hanging is easily acquired, but the tasteful choice of paper for various situations is a gift of no such easy acquisition. The walls of a room should be regarded as the mere framework of what the room is to contain. Their decoration should, therefore, bring into prominence rather than eclipse the contents of the apartment. Wall paper of glaring color and gaudy ornamentation brings into the utmost conspicuousness that which should be an accessory.
In a modern drawing room the ceiling should be tinted a color harmonizing with the wall paper, as no harmony can be hoped for when its main constituents are surmounted by the glaring white of an ordinary ceiling. The tint used must be one that softens into the wall paper, not one that contrasts; thus, if the tone of the room is that of a soft gray blue, the ceiling may be a clear flesh pink, or, if a gray, green paper, picked out with black, be the wall color, the ceiling may be of subdued lemon.
The ceilings are, in some cases, covered with a whole colored paper, bordered with a stencil pattern, representing thin garlands, but this is a more labored method than the simple coloring which answers the same purposes. The walls, if lofty, require a wide frieze, which gives an appearance of comfort-absent from the modern high-ceilinged room, papered in one uniform pattern. The frieze is divided from three to four feet from the ceiling, the coloring of the lower being, of necessity, heavier than that of the upper part, otherwise a top-heavy aspect is given the room.
When many pictures are to be hung, the lower part of the frieze should be of a whole color, for it is only on a whole-colored paper, or painted wall, for a background, that pictures can show to advantage.
When a whole tint is used for the lower part of the frieze, the upper portion should be decorated with a frieze paper of a good bold pattern, of coloring not too pronounced, and of a tint harmonizing with the lower section. Contrasts must be carefully avoided, but pale pink, blue, and amber can be blended above a subdued gray-blue ground. The two portions of the frieze should be separated with a light wooden (black or brown) molding or with a line of paint. The frieze decoration can be altered by placing the pattern upon the lower part, leaving the upper plain colored with or without a stenciled pattern. This will suit a room where few pictures are required, or one disposed to be dark. Some part of the wall should always be in plain color, as the eye requires rest; and no pattern, however subdued in hue, can give the relief to the eye that a bit of plain coloring affords.
This scarcity of ornament in one part of a room is amply compensated by the effect it gives to such parts as are bright, and rightly should be so. The true theory of effect is to use but one or two bright colors in a room, surrounding these with soft and subdued tints that do not impair, but emphasize the brilliancy. A number of bright colors placed together destroy each other's naturally pleasing effect, leaving no impression on the mind but glare and vulgarity. Having settled upon the paper and ceiling, have the woodwork and cornices of the room painted either a shade lighter or darker than the walls. The background of the room thus complete, the furniture will look much better than if stared out of countenance by glaring walls.
166. To prepare the walls, make a size of glue and water and heat in a kettle, such as shown in Fig. 60, over a charcoal stove, a form of which is shown in Fig. 61. Then give the walls a coat of a very weak solution of the same, with a broad, flat brush, such as shown in Fig. 62. To make a paste, take 2 pounds of fine flour, put in a pail, add cold water, and mix it together in a thin dough. Take a piece of alum about the size of a small chestnut, pound it fine and throw it into the paste; mix well. Then pour in about 6 quarts of boiling water, mixing with the paste while hot until the whole is brought to a proper consistency; use when cold.

Fig. 60.
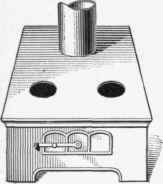
Fig. 61.

Fig. 62.
The walls should be thoroughly dry before the paper is hung. The surface of walls, prepared for the first time, should be stopped, rubbed smooth with a piece of pumice stone, and then treated with a coat of size as before mentioned, which prevents the plaster from absorbing the paste. In order to obtain a smooth surface, a plain, coarse, white lining paper is sometimes hung first. In hanging lining paper, the edges of adjacent pieces overlap about 1/2 inch, and are distempered and well rubbed down, to prevent their showing through the wall paper. Common papers are hung with the lap of their trimmed edges facing the light, so that they may cast no shadow. The finest papers are hung edge to edge, or butted together, and where the walls are damp, canvas may be stretched tight over battens or furring strips, nailed to the plaster so as to leave an air space between the walls and the paper. This method has, however, disadvantages, as the canvas expands and contracts with changes in the weather. When it is, however, resorted to, the heads of the nails securing the canvas should be covered over with strips of common paper before the wall paper is hung, but if the nails be of iron they should be painted. In ceilings, the edges of the paper should run at right angles to the principal light of the room.
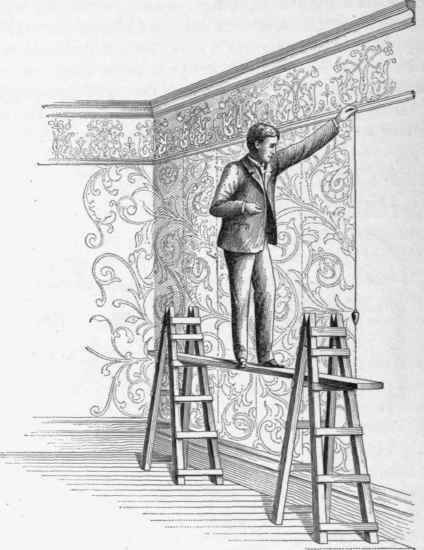
Fig. 63.
In papering a wall, the preparatives just described having been attended to, the paper is trimmed and the paper hanger plumbs the wall, so as to hang the paper in perfectly vertical strips, as shown in Fig. 63. After hanging the paper, he should smooth it down with a smoothing brush, as shown in Fig. 64, to cause it to adhere to the wall surface, throughout its entire length.
167. In cases where a varnished paper is required for certain walls, such for instance as those of a nursery, or bath room, or of narrow passages, or for the walls of more important rooms, the wall paper may be given two coats of sizing and then varnished in two coats or more. The second coat of sizing is applied to make sure that the surface of the wall paper is entirely covered. A washable varnished paper is, however, manufactured and easily procurable.
The preparation of the size for varnished paper varies according to the quality of the glue used. If the best white glue is used, we would advise 1/4 pound of glue to 1 gallon of water as follows: Place the dry glue in a vessel, covering it with water. When the glue has become soft and pulpy, take it up in the hands, squeeze out the water, and then boil over the fire, placing the vessel containing the glue into a larger vessel containing hot water, the object being not to burn the glue or size, by placing it directly over the fire. The glue thus melted is then mixed in a gallon of boiling water, and having been allowed to cool is ready for application to the wall. If, in applying the size, it is found that the colors in the paper rub up, the first coat of size must be sprayed on with an atomizer. The varnish used is known as dammar or light enamel varnish (Art. 84).

Fig. 64.
Continue to:
My Books

