Lesson X. Button-Hole Stitch
Description
This section is from the book "Educational Needlecraft", by Margaret Swanson And Ann MacBeth. Also available from Amazon: Educational Needlecraft.
Lesson X. Button-Hole Stitch
Age : 10-11 Years
One yard of linen 36 inches wide, from 15. upwards, will give 72 lengths 12 inches * 1 1/2 inches, sufficient for collar or book-marker. Needles, No. 3 " Scientific" sharps. Thread, No. 18 cotton embroidery thread. (This depends on the texture of the linen.) Mats form a good exercise at this point also.
A fresh variety of texture is here introduced - linen - a fabric liable to fray like flannel and requiring a protection for the raw edges, when the linen is of a quality too thick to fold. Hence the knotted stitch, named Button-hole Stitch.
Sewn widely apart, yet strong enough to prevent the ravelling of raw edges, the stitch is known as Blanket Stitch or Loop Stitch (Diag. 32): sewn quite closely together, as in Diags. 33-36, it is known as embroidery or single button-hole stitch.
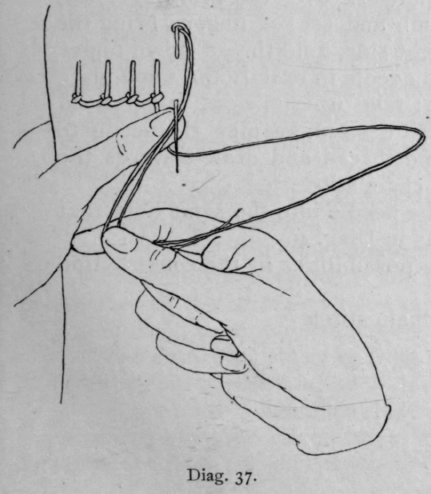
Double button-hole stitch has a second knot, sewn as in Diag. 37, known as " tailor's twist," and making a very beautiful piece of stitchery.
The return to the mind of the sensation of having made a strong, enduring stitch or series of stitches, prepares the mind more and more for reactions.
Discrimination between stitchery suitable for various materials is strengthened, and upon the vigour of the girl's mind the creative power depends, moved by the joy of the worker.
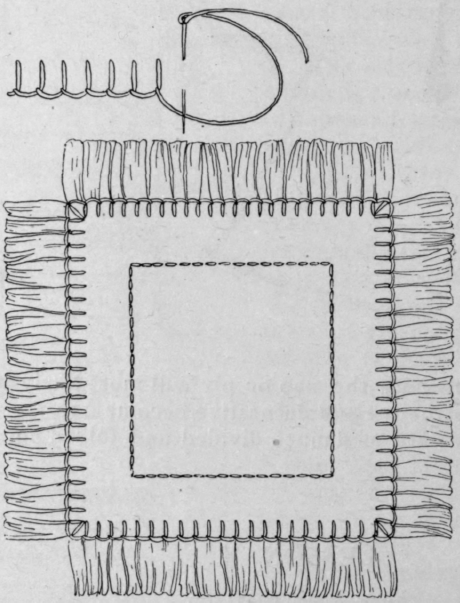
Method, - Work from left to right. The small mat suits the purpose admirably. Begin with a back stitch or leave enough loose thread to darn securely on the wrong side. Hold the work over the first and second fingers, with the raw edge towards the worker. Keep firmly in place with the thumb and third finger. Bring the needle out at the raw edge: keep the thread beneath the thumb. Insert the needle with 1/8 inch to 1/4 inch space between each stitch, and proceed till the corner of the mat (Diag. 32A) is reached, where the corner stitch will form a diagonal line with the last and first stitch of each side respectively.
Diag. 32.
Diag. 32A.
In all cases the thread should not be drawn too tightly, as the edges turn up. Threads should be finished by darning a few stitches at right angles to the raw edge, and fresh threads begun by darning down a few stitches in the reverse direction, bringing the needle out at the twist of the last stitch made.


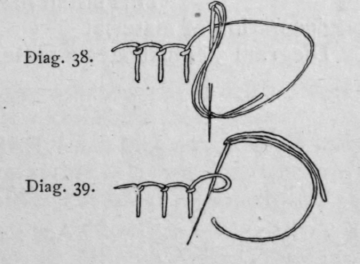
Diags. 38 and 39 illustrate other methods of button-hole stitching.
Continue to:
My Books

