How to Make Copenhagen Sideboard
Description
This section is from the book "Box Furniture", by Louise Brigham. Also available from Amazon: Box Furniture.
How to Make Copenhagen Sideboard
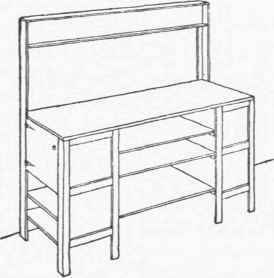
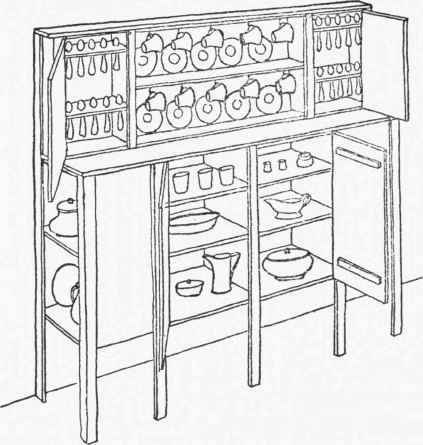
Made of seven boxes, the four larger ones, forming the lower section, being alike. The two end compartments are open at the side, without doors, and afford ample space for a table set. The upper section consists of two boxes of equal size, with a wider and longer box set between them. The entire sideboard is closed at the back. Each section has a false top its full width and length. The rear legs extend to the top of the upper section.
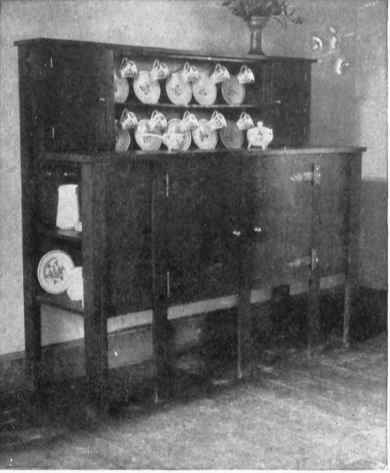
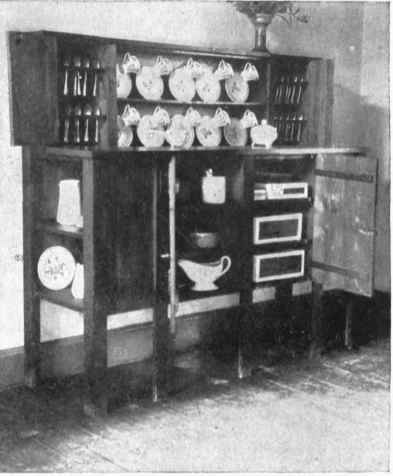
The Copenhagen Sideboard, Closed and Opened.
Requirements. Lower Section
Body. 4 Butter Boxes (11 in. deep, 16 in. wide, 22 in. long). Shelves. 4 Pieces 1/2 in. thick, the width equal to the inside depth of the box, and the length equal to the inside width of the box. 2 Pieces 1/2 in. thick, the width equal to the inside depth of the box, and the length equal to the inside width of the box.
Shelf Cleats. 8 Strips 1/2 in. thick, 1 in. wide, and the length equal to the inside depth of the box. 4 Strips 1/2 in. thick, 1 in. wide, and the length equal to the inside depth of the box.
Doors. Made from the covers.
Door Cleats. 4 Strips 1/2 in. thick, 1 in. wide, 1 in. shorter than the width of the door.
Facing Strips. 3 Strips 1/2 in. thick, 2 in. wide, 11 in. longer than the outside length of the box.
Legs. 2 Strips 1/2 in. thick, l 1/2 in- wide, 11 in. longer than the combined heights of both sections and the thickness of the top added. 2 Strips 1/2 in. thick, 2 in. wide, 11 in. longer than the combined heights of both sections and the thickness of the top added. 2 Strips 1/2 in. thick, 1 1/2 in. wide, 11 in. longer than the outside length of the box. 2 Strips 1/2 in. thick, 2 in. wide, 11 in. longer than the outside length of the box.
Hardware. 4 tee hinges and screws. 2 pull-knobs. 2 buttons.
Top. 1 Piece 3/4 in. thick, 1 1/2 in. wider than the outside depth of the box, 2 in. longer than four times the outside width of the box.
Upper Section
Body. 2 Dried-fruit Boxes (31/2 in. deep, 11 in. wide, 14 in. long). 1 Dried-fruit Box (3 1/2 in. deep, 14 in. wide, 32 in. long).
Shelves. 4 Pieces 3/8 in. thick, the width equal to the inside depth of the box, and the length equal to the inside width of the small box. 1 Piece 3/8 in. thick, the width equal to the inside depth of the box, and the length equal to the inside length of the large box.
Doors. Made from the covers.
Facing Strips. 4 Strips 3/8 in. thick, 1 1/2 in. wide, and the length equal to the outside length of the small box.
Top. 1 Piece 1/2 in. thick, 1 in. wider than the outside depth of the box, 2 in. longer than the outside length of the large and twice the outside width of the small box.
Hardware. 4 1 1/4 in. brass butts and screws. 2 pull-knobs. 2 brass buttons.
Construction. Lower Section
Make the legs - two, 11 inches longer than the outside length of the boxes; two, 11 inches longer than the combined outside length of both the upper and lower boxes and the thickness of the top added.
Remove the covers from two of the boxes and fit and nail the shelves in, one shelf being 8 inches from one end and the other 5 inches from the other end, measured inside. Nail them through the sides into the ends of the shelves. Lay one box on its side and place the other on its side upon it. Match the edges and nail them together through their abutting sides, and clinch the points of the nails.
Remove one side from each of the other two boxes, and fit and nail a shelf in each midway its length. Place one of these boxes on its side upon the other two, with the open side up, and nail to the one below it as before, having the outside face even with the edges of the open compartments of the others. Invert them and place and nail the last box in the same manner. Turn them flat side down, the open side of the middle compartments facing up, and put on both the corner and the facing strip legs, the front legs having their upper ends even with the top end of the boxes, allowing all their lower ends to project 11 inches below the other end. Nail the cleats to the inside face of the doors. Fit and hang the doors and turn the piece face down, and put on the rear legs, one at each corner, allowing their lower ends to project 11 inches. (The end boxes will project the thickness of the covers beyond the backs of the middle boxes.) Turn the sideboard upon its legs and nail on the top, having its rear edge even with the back face of the rear legs, allowing it to project 1/2 inch over the outer face of the legs in front and at the ends. It will be necessary to cut the rear corners of the top and let the legs in about an inch.
Top Section
Remove the covers from the small boxes and fit and nail the shelves in place, having one shelf 4 inches from the inside face of one end and the other shelf 3 inches from the inside face of the other end. Before nailing in the shelves, however, bore five holes in each shelf about 1 inch from the edge, the holes being just large enough in diameter for the handles of the spoons to pass through. Fit and nail the shelf in the larger box, placing the shelf midway the width of the box. Place the larger box on end, and upon it place one of the small boxes laid on its side, the open compartments all facing the same way. Nail the other small box to the other end, matching the edges of all of them before nailing together. Place this section upon the lower section between the rear legs and nail the legs to it. Nail on the facing strips, keeping the outer edge of the end ones even with the end face and the inner edges of the inner ones even with the inside end face of the middle compartment. Nail on the top, having it even with the rear face of the legs and allowing it to project 1/2 inch over the outside face of the legs at the ends and front. Fit and hang the doors, having their outer faces even with the outer face of the facing strips.
Make a groove, 1/4 inch wide and 1/8 inch deep, the entire length of the shelf, and a similar groove in the bottom of the cup-and-saucer compartment, 2 inches back from the front edge, to keep the saucers from sliding forward. Place the saucers in position and screw hooks to the under side of the shelf and to the top of the upper compartment, in line with the center of the saucers, on which to hang the cups. Screw on the pull-knobs and buttons.

Continue to:
My Books

