


Divided Monoplane
Description
This section is from the book "Handy Man's Workshop And Laboratory", by A. Russell Bond. Also available from Amazon: Handy Man's Workshop And Laboratory.
Divided Monoplane
Among various toy monoplanes on the market is one with a divided main plane, designed to rise from the ground after running along on three wheels until it has gathered sufficient momentum. A rubber tube is used, in place of rubber strands, to propel it, for the reason, probably, that it does not take so many turns to get enough power to run the machine. While rubber strands take more turns when winding up, they give more power to the propeller, even after being more than half spent, because of their greater elasticity.
Although the design may be criticised because of its heavy construction and the fact that the main plane is divided, the details of the machine are given herewith for the amateur to improve upon or experiment with. By closing the gap between the plane with very light silk I got a flight of over 100 feet before I made any other adjustments. 1 also found that by using a lighter body frame and a larger propeller I could get greater flights, though no higher than five feet from the ground.
The body of this aeroplane is constructed of wood, as shown in Fig. 361. The front brace measures 11 inches long, 1/2 inch wide and 3/16 inch thick, the rear brace 7 1/2 inches long, 1/2 inch wide and 3/16 inch thick, and the three bamboo sticks 15. 16 and 17 inches long by 1/4 inch thick. To support the planes, an umbrella rib is used, while the wheel support and propeller guard are made of stiff wire. After making the braces, bore a hole 1/4 inch diameter in the from brace at 1/2 inch from one end and another hole 8 inches from the same end. Bore 1/4 inch hole in the rear brace as well, 1/2 inch from end. and also one in the center; then bore another 1/4 inch diameter hole on a slight slant 3/4 inch below the center hole. These holes are for the bamboo sticks. Take the 16-inch bamboo stick and insert it into the upper hole (8 inches from the end) of the front brace, and into the center hole of rear brace. Should the fit be too loose, take a few turns of paper around the sticks and force them into the holes, using fish glue if necessary to hold them firmly. Now take the 17-inch stick and insert it into the lower ends of both front and rear brace. The stick will have a slight curve, which will he found necessary, for without this curve one cannot use the rear wheel as a means of support for the aeroplane while rolling along the ground in starting. Put the 15-inch stick into the hole below center of the rear brace and you now have the body complete.

Fig. 361 - Construction of the monoplane with divided front plane.
Before proceeding any further, look around for an old useless umbrella and take out a rod not less than 28 inches long. If longer cut it to size with a pair of cutting pliers, and carefully open up the rod where the pliers pinched it together in cutting. Cut also two pieces of 11 1/2 and two pieces 8 1/2 inches long; then two pieces of silk 12x9 inches for the front planes and 10x9 inches for the rear plane; the extra 1/2 inch allows for all seams, which should be sewed with finest hemstitch possible.
After the silk has been sewn as directed, fasten the center of the 28-inch rod to the front brace and over this slip one of the large planes at one end, sew it into position, then take the 11 1/2-inch length and insert in the opposite end; do the same with the other side and yon have your main plane finished. Now take the small 8 1/2 x 9 1/2-inch plane and at each end insert the 8 1/2-inch rod. which is the width of the rear plane, fasten it to the extreme end of the 15-inch rod. Get what is termed cable cord (any other strong cord will do just as well) and run it from right end of the main plane to the right end of the rear plane and back to the opposite or left end of the main plane. Do the same with the other main plane and you have completed (except for the power mechanism) the aeroplane.
To make the propeller, take a rod 7 inches long, drill a small hole through the exact center and flatten the rod at each end for about 1/2 inch. Then take stiff tin and cut out two 2 x 3-inch blades for the propeller. At 1 1/2 inches from the end of the blade cut a slot to receive the end of the rod which is bent over and hammered down. Bore two small holes near the inner end of the blade end for a piece of copper wire, which is looped over the rod to secure the blade. Run a stiff piece of wire through the hole in the center of the rod and fasten it. This is the propeller shaft. Pass the wire through a piece of bamboo 1 1/2 inches long, then insert an ordinary glass bead and small copper washer. The bead and washer will act as a ball thrust bearing when the rubber is twisted to give power. The wire shaft is then passed through a hole at the center of the front brace and bent to form a hook.
Another piece of stiff wire is bent to form a crank handle and is threaded through a bead and washer, after which it is passed through the small hole bored at 2 inches from the lower end of rear brace, and a hook is formed on the inner end. The rubber tube is now looped over the two hooks.
For the wheels, almost any circular article will do. Large 1-inch buttons can be used to good advantage, or any small and light wheels from sonic broken toy. Make the axle of wire, inserted through a piece of bamboo 6 inches long". Bend the wire as shown in the photograph and fasten the wire to the front brace To brace the wheel, tie the axle in the position shown. At the extreme end of the rear plane fasten another wheel, and the aeroplane is complete, as shown in Fig. 362.
To make the aeroplane fly, turn the handle (holding the propeller at the same time) about 50 to 75 times if rubber strands are used, and if tube is used about 20 to 30 times are enough for the first trial, release the propeller after having placed the aeroplane in position on the ground, and it will then fly, if everything is adjusted properly.
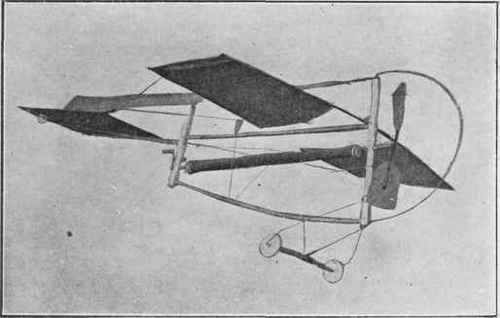
Fig. 362 - A monoplane with divided front plane.
A good help in experimenting will be to bore a small hole a little below the handle and insert a small wire to act as a stop. Such a stop may also be used to a good advantage for the propeller. The guiding plane at the top of the aeroplane is made from silk 3 inches wide and 32 inches long, and it is used to help keep the aeroplane on a straight course. It also may be done away with entirely, as it is not absolutely necessary. After a few-trials the maker will know just what proper adjustments are necessary for the best results. Fig. 363 shows one of these toys in flight. An excellent view of one of these machines is also to be seen in our frontispiece. - 93.
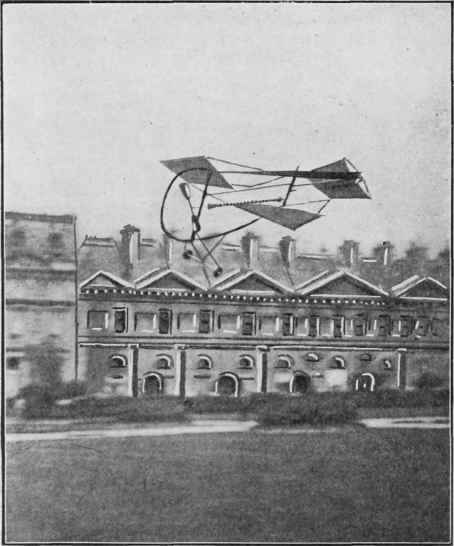
Fig. 363 - A monoplane model in flight.
Continue to:


My Books

