Editing The Film
Description
This section is from the book "Time Out for Living", by Ernest DeAlton Partridge and Catherine Mooney. Also available from Amazon: Time Out for Living.
Editing The Film
The job of editing the film after it has been returned from the developing process is interesting and also very important to the final movie. If the movie has been produced according to a scenario, the matter of editing is simply to arrange the scenes in their proper order and splice them together. If, on the other hand, the editing has to do with a movie of a trip or some other series of scenes that were taken as they happened, it is a matter of arranging them in some logical order for presentation on the screen.
A Splicing Machine
One of the most helpful devices for editing can be made at home. This is a board with rows of hooks or nails. Each of these hooks is numbered from one up. If the film to be edited has a scenario, as each scene is cut it is rolled up into a small roll and hung on the hook representing the number of that scene in the scenario. When all of the scenes have thus been identified and placed in their proper order, it is a simple matter to splice them together in the proper sequence.

When there is no scenario to guide in the editing, the process is a little different. Under these circumstances it is well to project the film as it is on the screen and make a separate card for each scene, describing it briefly. Notes should also be made of any defective scenes that should be cut out. These cards can then be sorted into their proper order and numbered. The film can then be cut and placed on the board, as explained above.

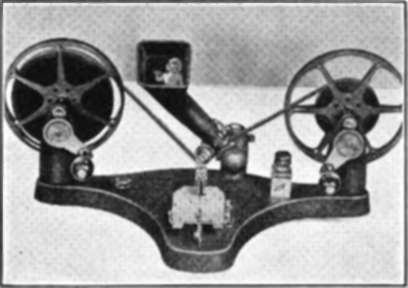
A Splicing Machine With Reels
The film is wound upon the reels.
The splicing of the film is a simple matter when one has a splicing machine. The machine shown in the illustration holds the two ends of the film securely while they are trimmed and scraped. Cement is then spread over the ends, which are pressed together until they stick. The whole process is very simple and takes but a few seconds, when one has learned how to work the splicer. More expensive splicers can be had, with reels on either side upon which to wind the film, and a viewer that shows the film on a small glass.
It is a good plan, when you are simply taking movies of the summer's activities as you go along, to edit the films as they come back from the developing process. Too many people who take movies allow them to accumulate, thinking that sometime they will get around to editing them. That time never comes, and so they and their friends never get full benefit from their movies.
A Splicer And Viewer
This machine is helpful in editing the film.
Titles
One of the reasons why movie-making is such a fascinating hobby is that it has many different phases in which the individual can show his originality and skill. Take the making of titles for example. Clever titles, properly placed, can liven up a movie tremendously. Dull titles can make a good movie uninteresting. Interesting and brief titles are difficult to create.
First of all, in writing titles for a movie one must take care to see that they are composed in a way to add to the story rather than detract from it. Here are a few suggestions about writing tides that will help make them add to the movie.
1. Keep them as short as possible. Long titles which go into great detail are tiring to the audience. The population of towns, the size of farms, the number of cattle in a herd, these are details that should not be added unless they are absolutely necessary.
2. Titles should not be written in the first person, but rather in a simple, impersonal style. Instead of saying, "I shall now show you Mt. Hood in the distance," say, "Mt. Hood looms up dimly in the distance."
3. Let the pictures tell the story as much as possible. Do not tell what is coming with a title; if you do, you spoil the suspense. Instead of saying, "Arthur will now shoot the rapids," say, "Here is a thrilling scene."
4. Titles are punctuated in the same way as any other written English. Be sure to include all quotation marks.
5. In taking a movie of the title, allow plenty of time for the slowest reader to read it. At least one second per word is necessary. Read the title through twice while the camera is running to make sure that enough time has been used. It is much better to make the title a little too long, at first, than a little too short. You can always cut a litde out, but it is difficult to add to it.
There are many ways of making titles, some of which are quite easy. For example, if you are making a movie of a fishing trip into Canada, the road signs along the way, the name of a town on a sign, the name of the boat that carries you across the river, all of these titles are good and in their natural setting. They are made and perhaps recorded in your notebook as you travel.
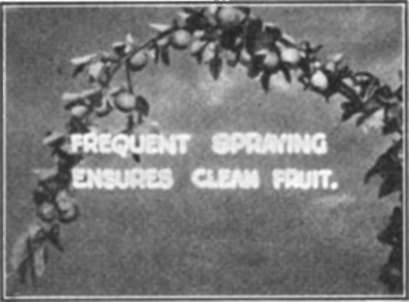
This interesting title was made by exposing the film twice, first for the fruit and then for the words. The words were lettered in white on a black background. You could make this title, also, by putting the letters on a piece of glass or transparent celluloid and taking the picture of the fruit through the glass or celluloid.
In making the titles at home, you can build a little rack to hold the lights, the camera, and the title to be photographed, something like the machine shown in the picture. It is a simple matter, then, to make a variety of titles, using snapshots, travel posters, or other decorations as a background. Attractive titles add life to the movie.
Continue to:
My Books

