Play-House, Store, Or Cabin
Description
This section is from the book "Woodworking For Beginners: A Manual for Amateurs", by Charles G. Wheeler. Also available from Amazon: Woodworking For Beginners.
Play-House, Store, Or Cabin
The design shown in Fig. 376 can be carried out in the manner already described.
Before beginning work read carefully Marking, Rule, Square,
Saw, Plane, Nailing, Screws, Painting, in Part V., and look up any other references.
The ground dimensions can be 6' or 7' x 8' or 9'. In making the ends where they are cut off at the top to give the slant for the roof, inside cleats should be used. Mark lines, using a straight-edge, for the slant for both sides of the roof, and saw the boards off by these lines. It will be convenient and will look well to make the angle at the top a right angle. At the top saw out a notch in which to rest the ridge-pole, as shown in Fig. 377.
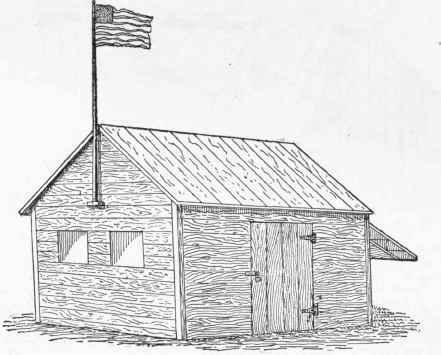
Fig. 376.
After the sides and ends are fastened together, nail the ridgepole in place and get out short boards for the roof. Cut these for one side of the roof so as to be about 2" longer than the slant of the end of the house, and make those for the other side of the roof as much longer as the thickness of the boards, so that they will lap over at the top, as shown in Fig. 377. Nail them on, beginning at one end, so that the roof will overlap the ends and sides 2" all around.
Nailing upright strips at the corners, as is commonly done on wooden houses, and as is shown in the picture, will give the house a more finished appearance. The other details are similar to those already shown.

Fig. 377.
This house can have a floor, which can be made of 2" x 4" studding simply nailed together and floored over (Fig. 378), forming a sort of platform to which the sides and ends can be nailed when the house is put together; and the best way to make the whole structure is that shown in Fig. 377, the boards running vertically and cleats horizontally. In case of using a platform floor with this last method of construction, the lower cleats can be raised from the bottom so as to rest on the floor, as shown in Fig. 378. This makes the putting together of the house quite simple, as the fitting of the sides and ends and floor in their proper places obviates the need of testing with square or measuring diagonals. The lower cleats on the sides and ends are not really necessary, however, except for convenience in putting together and taking apart, as the vertical sheathing can be nailed directly to the floor-frame or sills, as shown in Fig. 377.
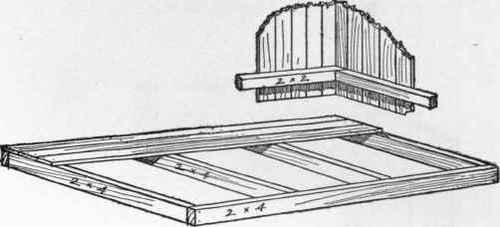
Fig. 378.
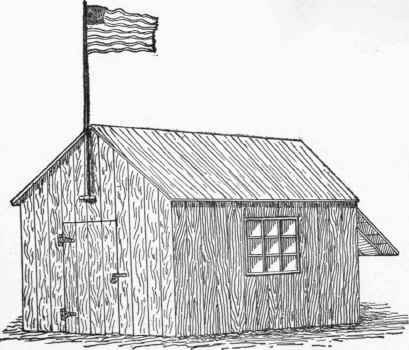
Fig. 379.
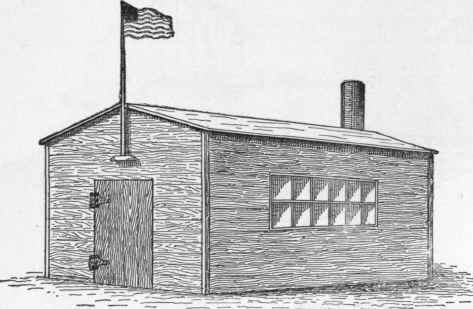
Fig. 380.
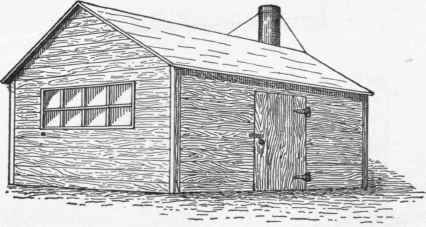
Fig. 381.
The whole can then be levelled (see Level and Plumb), being blocked up underneath as may be required.
The design is also suitable for a larger structure, in which case a frame should be made as shown in Fig. 389.
Another very similar design is shown in Fig. 379, and can be put together according to the principles already shown.
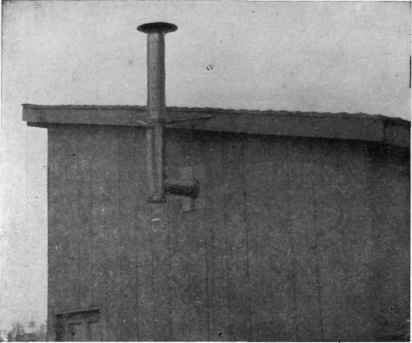
Fig. 382.
The boarding runs vertically and the cleats horizontally, as shown in Fig. 377.
Figs. 380 and 381 show other simple arrangements, the ground dimensions of which can be, perhaps, 8' x 12', and which can be put together in the same way as the preceding cases, with or without a floor, and with the boarding running vertically or horizontally.
If a stove is to be used, the smoke-pipe can be arranged to pass through the side of the house, as in Figs. 382, 383, etc. If to pass through the roof, it should be soldered or riveted to a sheet of metal, as galvanized iron, the upper edge of the latter being 17 slipped under the roof covering while the lower edge laps over it (Fig. 384), on just the same principle that shingles are laid, the idea being, of course, that the water will run down over the metal without leaking through, just as it runs down over the shingles. This simple principle must always be observed whenever metal is used to prevent joints leaking. With such small houses as these it is usually easier and safer about leakage to have the pipe run through the side of the house. If to go through the roof (particularly when there is no special roof covering but boards), it is a good plan to have the pipe pass through the roof near the ridge, so that the upper edges of the metal sheet can be slipped under one of the saddle-boards (Fig. 385). In any case, an air space must be allowed between the smoke-pipe and the wood, and it is always well to have a collar an inch or two outside of the pipe. Any tinsmith or metal-worker can arrange these details.
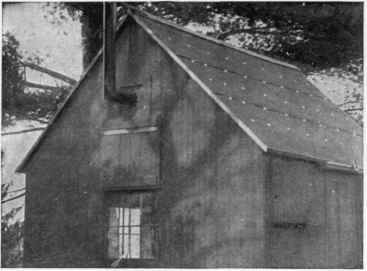
Fig. 383.
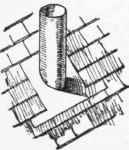
Fig. 384.
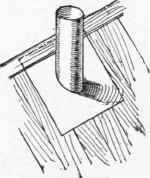
Fig. 385.
Round drain-pipe set in cement is often used for a cheap pipe or chimney, and answers the purpose very well.
Fig. 383 also shows the way to lay sheathing- or roofing-paper in case you wish to use it for a temporary structure. It also gives a suggestion for a window-shutter to be raised by a cord passing through to the inside, where it can be fastened to a cleat.
Continue to:
My Books

