Sharpening. Part 3
Description
This section is from the book "Woodworking For Beginners: A Manual for Amateurs", by Charles G. Wheeler. Also available from Amazon: Woodworking For Beginners.
Sharpening. Part 3
When you get to the point of filing and setting your saws you are advised to take a lesson from a good saw-filer. There are few persons so situated that they cannot do this, or at least watch someone go through the process, and thus learn much more readily than by reading about the process in a book. In fact, it is one of those things that it is so hard to learn from a book that merely a few remarks on the subject are given here.
The saw is firmly fastened in a saw-clamp, expressly for the purpose, so that it will not shake or rattle. The teeth are "jointed," or reduced to the same level, by lightly passing the flat side of a file over their points, lengthways of the saw. The saw can also be jointed along the sides after filing, but this is frequently omitted.
For a cross-cutting saw the file (a triangular saw-file) is held at an angle with the blade depending upon the particular form of tooth adopted, as you will see by examination. The handle being grasped in the right hand, the point of the file should be held between the thumb and forefinger of the left hand (Fig. 526). The file must be pushed across with an even, straight stroke, without any rocking or up and down motion, pressure being applied only on the forward or pushing stroke, the tool being drawn back very lightly or lifted entirely on the back stroke. The filing is begun at one end of the saw, filing only the teeth which bend away from you (i.e., every alternate tooth), carefully keeping the file at the proper angle, pressing only on the tooth you are filing, but keeping the tool lightly touching the adjacent tooth, and making allowance for the fact that when you file the alternate set the passing file will take off a little from the teeth first filed- The saw is then turned around and the process repeated with the other teeth. If you look lengthways along the edge of a panel-saw that has been properly filed and set, an angular trough or groove will be seen along the whole length, so that you can slide a needle along in it from one end of the saw to the other.
The ripping-saw is usually filed squarely across the saw (at right-angles to the blade), as you will see at once on examination of the teeth (Figs. 654 and 655), but sometimes at a more acute angle.
The teeth are set by bending every other tooth outward, first setting those on one side and then those on the other. You should do this with some one of the various adjustable tooth-setting contrivances sold for the purpose, as it requires a skilled workman to set teeth in any other way, and any attempt on your part to do so without some instrument adjusted to the purpose will probably result in damaging the saw.
For soft and loose-fibred wood more set is needed than for hard wood, because the fibres, which are quite cleanly cut or broken in the hard wood, in the more yielding soft wood are bent aside by the teeth to close in upon the blade with considerable binding force; and less set is required by fine work than for coarse. The angles and points of saw teeth can be more acute for soft than for hard wood.
To sharpen the scraper you must have a sharpener or burnisher. The edge of a chisel or any piece of very hard steel can be used after a fashion, but it is better to have a regular tool for the purpose, which can be made easily from an old three-cornered file, such as is used for filing saws, by grinding off the teeth and slightly rounding the angles on the grindstone until the whole tool is smooth. Two opposite edges of the scraper are ground or filed and the edge then turned over by the burnisher. Some workmen grind the edges with an obtuse bevel and use only one angle of each edge. Others grind the edges square and use both angles of each edge. The bevel gives a slightly keener scraping edge than to grind the steel square, but it requires more frequent sharpening and the squared edge turned over on both sides is likely to be more satisfactory.
First grind or file the two opposite edges squarely across and slightly round each corner to prevent scratching the wood. If there is a burr at the edge it can be removed by rubbing the scraper lightly on the oilstone, but this is advisable only for final scraping of very fine work. Having thus got the edge at right angles and smooth, lay the scraper flat on its side near the edge of the bench and rub the burnisher back and forth a few times in the position shown in Fig. 673, which is almost flat on the scraper. This rubbing bends a little of the steel over the edge. Do this on each opposite edge of the two sides, giving four edges thus curled over. Next, holding the scraper as shown in Fig. 674, draw the burnisher with a firm, even stroke, once or twice, lengthways of the edge, as shown. The scraper can be laid flat on the bench, if preferred, slightly projecting over the edge. Notice that the tool should be drawn with a slightly end to end motion, as shown, which helps turn the edge. This turns a fine scraping edge, which will take off shavings. All four edges are treated in the same way. After one edge gets dull, use another. When all four are dull, resharpen with the burnisher as before, without grinding or filing the edge. This can be done a few times, but soon the edges will get worn off and rounded, and the scraper then needs refiling.
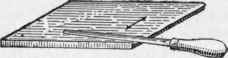
Fig. 673.

Fig. 674.
Continue to:
My Books

