Lesson XVIII. Making A Halved Tee
Description
This section is from the "Elementary Woodwork" book, by Frank Henry Selden. Also available from Amazon: Elementary Woodwork for Use in Manual Training Classes.
Lesson XVIII. Making A Halved Tee
The stock for this exercise should be the same as for the halved corner (Lesson 16 (Halved Corner)).
Reduce the piece to the exact width and thickness. Leave the ends rough. Lay off the halved end by following the drawing in the same manner
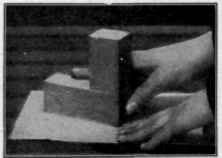
Fig. 63. Sandpapering at the Corner. The end grain only is sanded in this manner.
as you laid off the left-hand end of the halved corner (Lesson 16 (Halved Corner), Fig. 50). Remember to make all gauge lines with the head of the gauge against the face side. Cut the piece in two by drawing
Fig 64. Halved Tee.
two lines entirely around it near the center and sawing between them, as in Lesson 16 (Halved Corner). Draw one of the lines for the side of the gain with the try-square and knife. Place the end which is to fill the gain or notch onto the piece which is to be cut

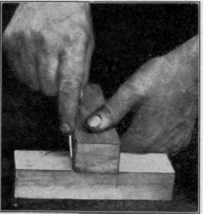
out and mark the width of the gain with the knife, as shown in Fig. 65. Remove the piece and draw a line with the knife and try-square just inside of the point made in marking the width. As the piece must fit the gain exactly, a line drawn at the side of the piece or through the mark made by the knife point would make the gain the width of the line too wide. This method of determining the width of a gain or similar opening is called "super-position." Make your lines exactly correct, and work exactly to them. Make smooth fine lines both with the knife and the gauge. Saw just enough inside the lines to allow for finishing the sides of the gain with the chisel. Do not think that because the sides of the gain will not show when the piece is together, that it does not matter how the end grain at the sides of the
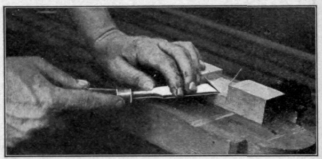
Fig. 65. (Jetting the Width by Superposition.
Fig. 66. Making a Shearing Cut in a Gain.
gain is cut. All such places should be cut very smooth, using the shearing cut the same as in smoothing the ends in Lesson 13 (Chiseling Ends), Fig. 43. Work the bottom of the gain the same as the halved corner. Use a shearing cut as much as you can, and hold the piece as shown in Fig. 66.
This piece should fit close enough to stay together without gluing. Dress off the end of the piece at the gain, or joint, with the plane, hording the plane at an angle of 45 degrees but moving it directly parallel with the edge (Fig. 61). Line and chisel the ends the same as the halved corner (Lesson 17 (Finishing The Halved Corner)), but do not plane the sides or use any sandpaper on either the ends or sides of this piece
Write your name and the date on the face side near one end.
Continue to:
My Books

