Lesson XVI. Halved Corner
Description
This section is from the "Elementary Woodwork" book, by Frank Henry Selden. Also available from Amazon: Elementary Woodwork for Use in Manual Training Classes.
Lesson XVI. Halved Corner
The stock for this exercise should be of pine or other soft wood. It should be 121/2 inches long, 13/4 inches wide, and 13/8 inches thick. Dress up the piece on all four sides in the same manner, and

Fig. 50. Halved Corner.
follow the same order that you did in planing the first piece or scale. Remember what is said in Lesson 4 (Finishing The Third Side) about setting the gauge so that you may plane off the line and yet have the piece full size.
We wish to have this piece of correct size, and straight to the very ends. The face side and face edge must be plainly marked as directed in Lessons 1 and 2 and shown in Fig. 11. This piece requires two sets of face-marks because it is to be cut in two.
Study the drawing (Fig. 50) until you understand thoroughly what is to be made. Lay out the piece as indicated by the drawing, using the try-square and knife to make the lines at right angles to the edges, and the gauge to make the lines parallel with the edges. Do not forget that the gauge lines must be drawn with the head of the gauge against one of the surfaces which has a face-mark. In changing from one side to the other side you should revolve the piece end for end in order
Fig. 51. Drawing Lines Across an End.
to bring, or rather to keep, the face-mark at the right side, so that the head of the gauge will be against the face-mark as the gauge is held in the right hand,.
The reason for always working from face-marks may not be understood by the pupil while making these first exercises, but it must be carefully attended to or later on much work will be spoiled. Draw gauge lines not only at the sides but also at the ends, holding the gauge and piece as shown in Fig. 51. Be careful not to draw lines beyond where the wood is to be removed, for if you do they will show on the finished work. Set the gauge to the exact distance
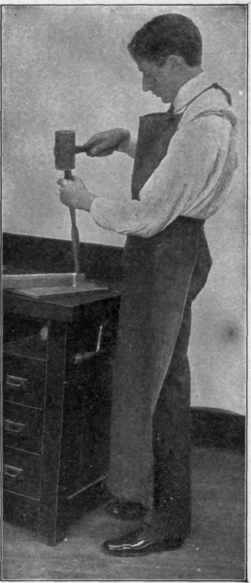
Fig. 52 Splitting out Waste Material. Do not use this method until you have learned to work as shown in Figs. 53 A and 53B.
when you are drawing lines for making joints and the like. The directions for setting the gauge a little large, so that the entire line may be planed off, apply only to lines drawn for the sizing of the piece. After the knife lines and guage lines are all drawn, examine the piece thoroughly to see if all are correct. If any mistakes are found, correct them at once. Mark the parts to be cut away at each end with a large X so that you will not make a mistake and cut from the wrong side. In this case, one mark will be on the upper, or face, side and the other mark on the lower, or back, side of the piece.
Lay the piece on the bench-hook, and with the backsaw saw just enough to one side of the line to allow for smooth-
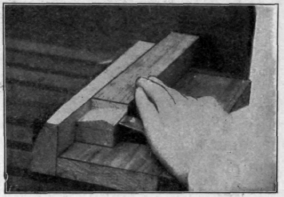
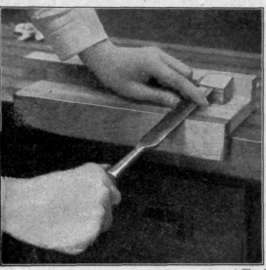
Fig. 53A. Chiseling at the Right Hand End.
Fig. 53B. Chiseling at the Left Hand End.
ing the end grain with the chisel, as in smoothing the end of the scale in Lesson 13 (Chiseling Ends). Saw each end, remembering to turn the piece over in sawing the second end. Be very careful to stop exactly at the gauge line.
With the piece on the bench-hook and the chisel in hand, as shown in Fig. 53 A, remove the waste material a very little at a time. After you have
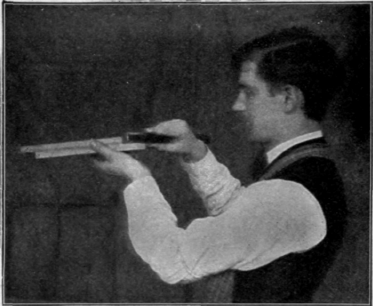
Fig. 54. Testing a Gain with a Chisel.
become skilled in using the tools you may place the piece on edge and remove a large piece at once by using the chisel and mallet as shown in Fig. 52, but for the first exercises it is best to do the work without a mallet and cut as thin and smooth shavings as you can. Instead of trying to do the work quickly, see how many and how wide and how thin shavings you can make. To begin this way will result in your doing more and better work in the future. By holding the chisel at a slant, so that one corner cuts ahead of the other, it will cut more easily and more smoothly. The way of the grain will
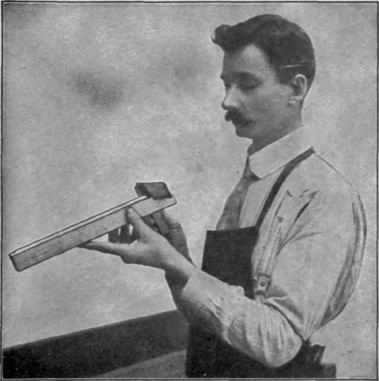
Fig. 55. Testing a Gain with a Try-Square. The head of the try-square is not held against the piece.
determine which corner is to cut ahead. Examine the pictures carefully and hold your tools in the same manner. Never place your fingers or hand where the chisel might injure them if it should slip, or the piece split.
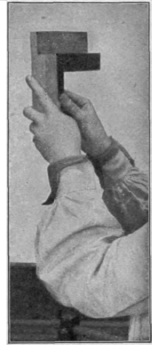
Slant the chisel so that it will be farther from the line on the back side than on the front side. Continue to work the notch down until the chisel is almost to the gauge line, then place the chisel exactly and squarely in the line and make a careful cut, finishing the gain at this point. When you have cut to the line at this edge, reverse the piece, holding it and the chisel as shown in Fig. 53 B, and cut to the line on this edge. It is not necessary to work much of the gain from this side. Do not use the vise for holding the piece. If you were a skilled mechanic you would not take the time to use the vise, and for the unskilled workman to use the vise is to lose the opportunity to learn that which the exercise is intended to teach.
Handle the tools with as little force as possible, for if they are properly used not much force is required. Use the chisel or blade of the try-square to test the gain, as shown in Figs. 54, 55, and 56. After each end has been properly finished, draw two
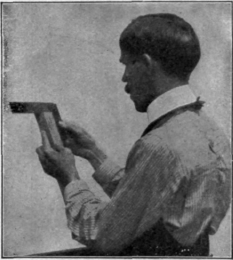
Fig. 56. Testing a Gain with a Try-Square. The head of the try-square is held against the face edge lines around the center of the piece about 3/32 of an inch apart and saw between them. Try the pieces together, placing the face-marks at the inside, as shown in the drawing (Fig. 50). Place the try-square at the inside angle to see if the pieces make a right angle as shown in Fig. 57, except that in testing the joint before it is glued
you will lay it and the try-square upon the bench. See that the joint fits tightly at all places. If the joint is not right, do not try to make it fit by cut-and-try methods, but find out what place is wrong and then reline it and work exactly to the line. Continue testing and relining until the fit is correct. When the joint is finished put a little glue on the surfaces which come in contact. Allow the
Fig. 57. Testing the Joint. Before the piece has been glued the joint should be placed on the bench and the try-square applied as indicated in this figure.
Fig. 58. Halved Corner Clamped.
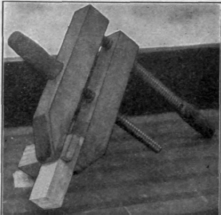
glue to dry until it will string out like cobwebs when touched with the finger. Then place the pieces together, being very careful to keep them in correct position, and put a clamp on them to hold them in place until the glue has dried (Fig. 58). Be careful that the clamp does not cause the pieces to slip apart. Always place the clamp on work so that the joint may be examined after the clamp has been tightened. (Read what is said about clamps in Part 3.)
Continue to:
My Books

