Lesson VIII. Edge And End Planing. Part 2
Description
This section is from the book "Elementary Woodwork", by George B. Kilbon. Also available from Amazon: Elementary woodwork.
Lesson VIII. Edge And End Planing. Part 2
Problem II. End-Planing
Take one of the boards planed in Problem I., and using the knife and try-square as in Lesson IV (Use Of Try-Square And Bevel)., square around 1/4 in. from one end, as in
Fig. 106, Rule II. In doing so always place the beam of the try-square against the tried side or tried edge mentioned in connection with Fig. 105. This is to insure accurate work.
Place the board on the saw-block, as in Fig. 107, and saw very close to the lines without touching them. Rule III.
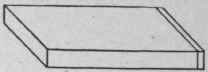
Fig. 106.

Fig. 107.
Hold the work in the vise and plane to the lines, using the block-plane as in Fig. 108, Rule IV. Test with try-square when nearly done so as not to plane beyond the lines.
In case it is not yet possible for a given pupil to saw sufficiently near to the lines, the wood remaining had better be chipped away, as in Fig. 109, and those who are so timid as to saw far from the line will have to chip twice, the first chipping being shown at Fig. 110.
Let us now give more detailed instruction for this chipping and planing, and explain Figs. 108 to 111 more minutely.
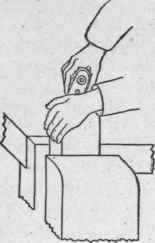
Fig. 108.
In Fig. 108 the hands nearly cover up both the plane and the work; but the intention is to show the palm of the left hand resting on the knob or throat plate screw of the plane, while the left fingers rest against the edge of the work farthest from the workman, and thus while assisting the right hand to drive the plane, give the workman power to stop the plane at will.
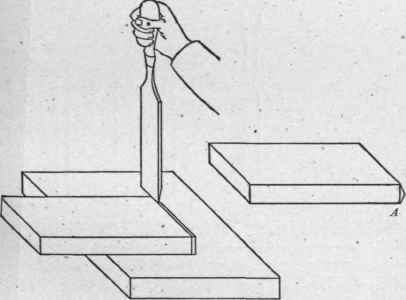
Fig. 109.
In Fig. 109 the work is represented lying on a chipping-block. Use the 1 in. chisel, utilizing not more than one-third to one-half of its edge at a stroke, as shown in the figure. The unutilized portion of the edge will, at each stroke after the first, follow the cut made by the preceding stroke and so guide the chisel. Let the chisel start in the line, and cut a surface slanting a little to the right so as not to disturb the line on the opposite side of the board. Turn the board over and cut from the line on that side in like manner, when the end will be crowning, or roof shaped, as seen, exaggerated, at A. Place the board in the vise, and, operating as in Fig. 108, plane off this crowning portion exactly to the lines. This chiselling and planing may be called a triple application of Rule IV.
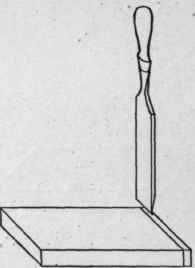
Fig. 110.
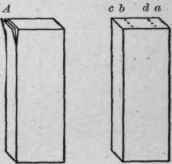
Fig. 111.
In Fig. 110 use only from one-third to one-half of the chisel-edge at a stroke, as was done in Fig. 109. Chip vertically, and proceed entirely across the board, keeping about 1/32 in. from the line. The work is then ready to fully treat, as in Fig. 109. A skilful pupil will saw close to the line, and to such these clipping directions are unnecessary in this connection.
Sometimes the amount of wood outside of the lines is too little to saw, and would then better be chipped away, instead, in accordance with Fig. 110, making one cut about 1/8 in. from the lines, then a second cut 1/32 in. from the line, and finally cutting, as in Fig. 109, and then planing as before.
Some important differences exist between the necessities of side and edge planing on the one hand and end-planing on the other.
First, In side and edge planing a shaving is usually taken along the entire length of the board, as previously stated. In end-planing this must not be done, since the wood will be splintered when the plane passes off, as at A, Fig. 111. To avoid this, plane a few times from a, about two-thirds of the way across the end to b, and then a few times from c to d, thus alternating till the end is complete.
Second, When planing sides or edges, be careful to hold the plane parallel to the direction of the shaving, as in Fig. 103. When planing ends, it is better to hold the block-plane at an angle to the direction of the shaving, as in Fig. 108, more clearly illustrated in the diagram, Fig. 112, which shows a block-plane commencing and finishing a stroke.
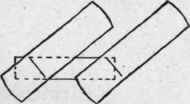
Fig. 112.
Measure 8 in. from the finished end, square around, saw (chisel if necessary), and plane to lines as before.
Treat all four boards in like manner; though, as stated before, rapid workmen will complete all four, and perhaps more, while slower workmen are making but one or two.
Mark according to power finally acquired in accurate planing.
Continue to:
My Books

