


Lesson XIV. Elementary Etching. Continued
Description
This section is from the book "Complete Self-Instructing Library Of Practical Photography", by J. B. Schriever. Also available from Amazon: Complete Self-Instructing Library Of Practical Photography.
Lesson XIV. Elementary Etching. Continued
349. Use Of Knife
Use Of Knife. The principal difficulty that beginners will experience is in the proper handling of the etching knife. You use the knife for the same purpose that you use reducing solutions, viz., to reduce high-lights in the negative, only the latter method is a chemical process, the solutions being used to bleach away any objectionable portions. When experienced in the handling of the etching tool much more delicate work can be accomplished than is possible with the reducing solutions. For broad patches, however, you may employ reducing paste very effectively, instruction for the use of which is given in the following lesson.
350. With the etching knife you reduce the high-lights by scraping and shaving down the film until the proper density has been obtained. In Illustration No. 20, page 149, is shown the proper way to hold the etching knife. The blade is held between the thumb and first finger, and should be held almost perpendicularly to the surface of the negative, having practically no slant. If slanted at all the blade should lean toward you, and not away from you. Too much slant to the blade will invariably cause you to cut too deeply. With the blade held perpendicularly you can better control the depth of the scraping. Use the slightly curved side of the blade for blending and for very light work. The straight edge is used for deep scraping and straight line work.
351. A proof should be made of the negative before attempting to etch, and the first strokes should be made very lightly. Do not carry the work quite as far as you deem necessary to fully remove or blend down the objectionable high-light that you are working on. At this stage make another proof, and if the objectionable part has not been sufficiently etched down, go over the work a second time, when you can better judge the exact depth required.
As a rule, the application of the etching knife will cause a slight grain effect which will hold out the light to a certain extent; therefore, in many cases it will be necessary to carry the etching a trifle farther than appears necessary to match the surrounding tint, the grainy effect produced by the etching making this portion a little more opaque than it appears to be when looking through the negative in the retouching frame.
352. Never use the point of the blade for scraping, as it will only scratch and not shave. The point is employed when you desire to etch in single hairs, build up mustaches, straighten lines, etc.
353. Practice Work
Practice Work. Before attempting to etch any portion of a portrait you should provide yourself with a number of discarded negatives, preferably those made with white backgrounds - i. e., negatives in which the background is quite opaque. Select one of these negatives and place it in your retouching easel. Having previously sharpened your etching knife, proceed to scrape or shave the film. Grasping the instrument firmly, hold the blade in a position similar to that shown in Illustration No. 20, page 149, and begin your practice on the background of the plate, scraping the film lightly at the start, and gradually a little heavier. Avoid scratching or digging into the film; merely scrape and shave the surface.
354. Do not attempt to cut through the film with one stroke. The first few strokes should make practically no perceptible mark, but with continual application, and after a number of strokes, you should gradually see a change taking place - the film becoming slightly thinner where the knife has been applied to it. By reference to Figs. B and C of Illustration No. 21, you will observe that the different shaped spaces near the shadow cheek are scraped quite evenly and are smooth, while those directly over the head are scratched and not shaved. The latter is caused by digging too deep and not holding the blade properly, which gives a scratched effect, while the others are worked more lightly, giving a smooth result.
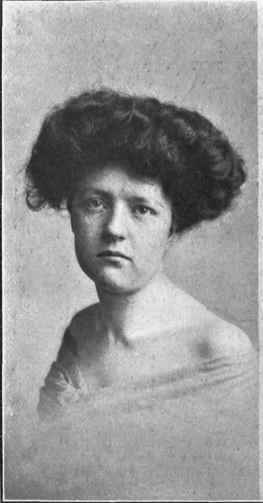
Fig. A
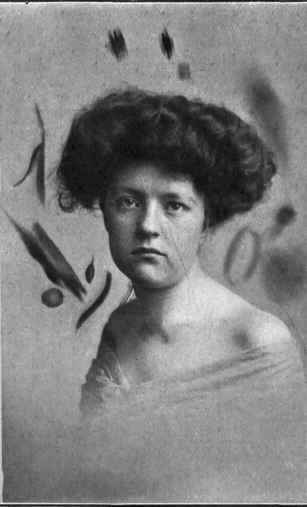
Fig. B
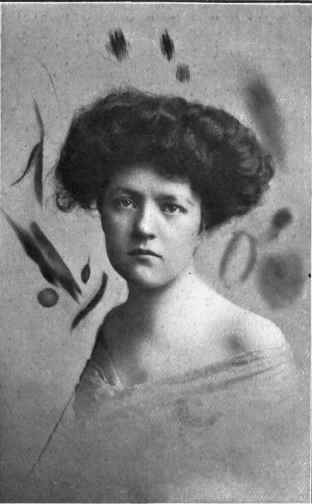
Fig. C
Illustration No. 21 Etching Exercises See Paragraph 354
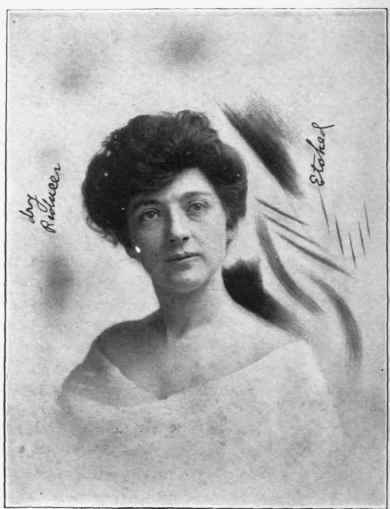
Illustration No. 22. Etching and Reducing Exercise.
See Paragraph 355.
355. In Illustration No. 22, you will observe the background of the negative on the high-light side of the subject is etched in patches of different density, from a very light shaving to quite a heavy one. Observe the gradual blend from the light to the heavy shade. This illustration is supplied merely as a guide for your practice work. The work applied to the background of these plates is not intended to improve the appearance of the negative, but merely to show how you must use and control the etcher so that you can shave the film lightly or heavily, and blend as you choose. In other words, the object of this lesson is to instruct you in the proper handling of the etching tool, and when you have once gained control of it you can shave the film as lightly or heavily as you choose, and are then prepared to advance further and apply the knife to the drapery and other portions, as required.
356. Having worked on the background you may attempt a little work at outlining the figure, separating it from the background, as shown in Illustration No. 22. Practice in a general way and apply the principles given in this lesson. One of the most important points to remember is, always to work lightly and not try to remove too much of the film at a single stroke. Continual shaving will produce the desired result. If you observe this caution you will seldom meet with any serious difficulty in removing high-lights, imperfections, etc.
357. Should the knife become dull, draw it over the oil-stone or emery cloth a few times, placing a sharp edge on it again. Successful etching cannot be done unless the etching knife is always kept in good condition. After you have used the curved edge and become accustomed to it, turn the blade over and use the straight edge, attempting to reduce larger areas on the background. The straight edge is seldom employed, except when reducing large spaces, but the practice gained by its use will assist you materially in the handling of the knife and aid you in gaining confidence in yourself when etching with it.
358. In order to see more clearly the effects of the
work you are doing, proof-prints should be made from the portion of the negative you have worked on. Make these proof-prints to a good depth - as deep as you would want a finished print - as this will give you an accurate impression of the final results.
359. As the success of etching depends largely upon the proper handling of the etcher, it is advisable to devote as much time as possible to the practice of shaving the film to different depths. The experience gained will enable you to gauge the amount of scraping necessary by the sense of touch, which will be your future guide.
Continue to:


My Books

