Lesson XIX. Etching And Altering Draperies And Figures. Part 4
Description
This section is from the book "Complete Self-Instructing Library Of Practical Photography", by J. B. Schriever. Also available from Amazon: Complete Self-Instructing Library Of Practical Photography.
Lesson XIX. Etching And Altering Draperies And Figures. Part 4
457. Altering Men's Clothing - Shaping And Outlining Figure
Altering Men's Clothing - Shaping And Outlining Figure. There are times also with men's clothing when considerable alterations are required, such as smoothing out wrinkles or folds in the coat, straightening shoulders, subduing the glitter on buttons, balancing the lapels of coats or vests, removing pocket-handkerchiefs, changing neckties, or even adding on collars. All these and seemingly more difficult things present themselves in the course of one's career, and they are quite easily accomplished if you proceed in the proper manner.
458. In order to demonstrate some of the most common corrections which one is called upon to make, we supply Figs. 1, 2 and 3 of Illustration No. 30. By referring to this illustration you will see in Fig. 1 that the lapels of the coat, also those of the vest, need attention; the shoulders need balancing; the glitter on the buttons need subduing; the shirt requires a collar and tie. With these corrections the picture appears quite presentable.
459. In making these alterations we begin first by straightening the shoulders. By reference to Fig. 1 of this
illustration you will observe that one shoulder is much lower than the other; therefore it is necessary to remove a portion of the outline of the left shoulder, which is the higher, and to build onto the right shoulder, which is somewhat lower. By referring to Fig. 2 you will observe we began by first outlining both shoulders with the pencil, working very lightly to give us the proper proportions.
460. Removing Wrinkles - Etching On Collar And Necktie
Removing Wrinkles - Etching On Collar And Necktie. We next proceeded to straighten the collar of the vest which, you will note in Fig. 1 is wrinkled and twisted, while in Fig. 2 we have etched a straight line over the wrinkle, thus straightening it, yet leaving it in an unfinished state. We have also outlined the collar by means of the pencil. We have raised the collar as high as we desire it by drawing a line. This line with the pencil on the negative, of course, reproduces white in the positive.
461. In order to outline the collar we made use of the etching knife, which you will observe in Fig. 2 gives a crude outline of this object. With this complete the outlining is done.
462. We next proceed to modeling our subject, beginning with the balancing of the shoulders. First, we selected the left shoulder, which, being black, required the use of a pencil to cut it away. For this purpose we used a soft BB lead, following the outline previously made with a pencil, working close to this line. With this accomplished the right shoulder required an addition, which was made by etching away the background to the outskirts of the line previously drawn, eliminating this line entirely. With these two methods we have now balanced the shoulders.
463. Next we directed our attention to the building on of the collar. The outlining, as you will observe in Fig. 2, has been done principally with a pencil, and as the collar is white and the flesh dark, we built the collar up to the white outline with a BB or soft pencil. Then, by means of the etching knife, we supplied a shadow between the laps of the collar, which gave us depth, and, in order to make the collar stand out from the shirt more promi-
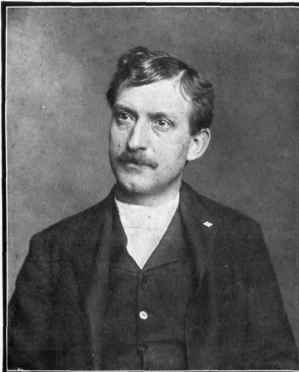
Fig. 1

Fig. 2
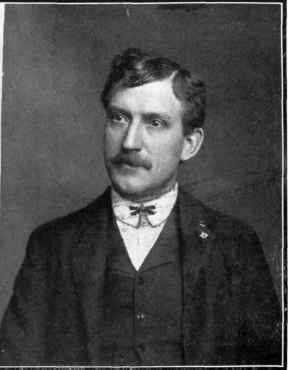
Fig. 3
Illustration No. 30 Practical Commercial Etching Sec Paragraph 458.
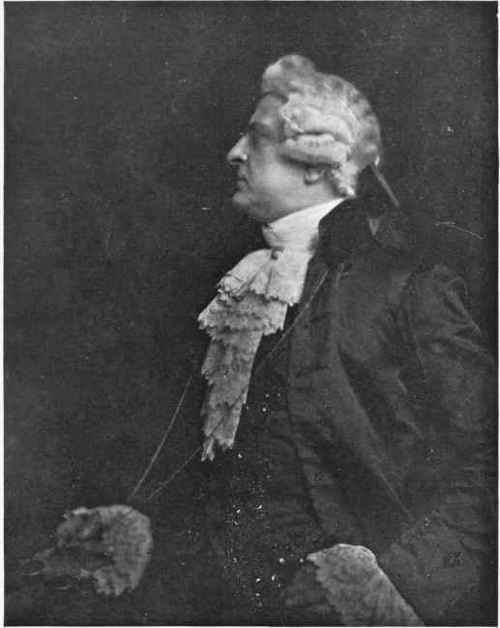
PORTRAIT STUDY.
Study No. 7
John H. Garo
nently, we etched a slight shadow underneath the collar. This was done with the point of the etching knife, and the point was also used in etching on the small necktie. For all commercial purposes we would advise the etching in of a larger necktie, but in order to demonstrate more clearly the method of procedure, and not to cover up any more of the outlining than was absolutely necessary, we have added only a very narrow necktie, which you can readily see can be easily modified and enlarged.
464. Following this work we next proceeded to reduce the high-light on the vest button, which, in Fig. 2, appears very conspicuously. This was subdued with the etching knife. The wrinkle in the vest was straightened by shaving the film, filling in the space and blending the wrinkle with the natural tone of the goods.
465. With the etching now practically complete, we next proceed to blend the work done with the pencil and etching knife. As the remainder of the work requires principally the applying of lead, we prepare the plate with the retouching dope, and proceed to the blending of the altered portions. Usually the portions that are etched are not sufficiently smooth to give an even blending; consequently these portions are gone over with the retouching pencil. This is especially necessary to produce roundness, as you will observe in the shoulders, for instance. By penciling over the sharp edge of the work done with the etching knife, you produce roundness to the shoulder and give it a more natural appearance.
466. The sharp edges of the collar, which were etched with the point of the etching knife, would appear quite abrupt unless slightly softened with the lead pencil, and these have been gone over with an H lead, while the space in the opening of the collar has been worked with a soft lead, or the BB.
467. This concludes the blending of the alterations made, and we now proceed to retouching the face, and as usual begin with the work on the forehead. You will observe, by reference to Fig. 2, a few stray locks of hair
falling over the forehead, which are unnatural and appear careless. These are removed with a BB lead.
Continue to:
My Books

