Preparing A Working Edge
Description
This section is from the book "Shop Projects Based On Community Problems", by Myron G. Burton. Also available from Amazon: Shop Projects Based on Community Problems.
Preparing A Working Edge
Paragraph 4. After the working face is completed the next step in squaring stock is to prepare a working edge. This is done by planing one edge at a perfect right angle to the working face.
To do this place the material in the vise with the edge up, as indicated in Figure 15; with the long plane (a jack-plane or a jointer) plane the edge the entire length of the board. In starting and finishing the cut at each end be careful to hold the plane so it will be level with the edge of the board, as already shown in Figures 11 and 13. In planing a working edge be careful to hold your plane exactly level, that is, it must not be tilted to either side. Let the entire sole of the plane rest on the edge of the board. Test the edge with the try-square, as shown in Figure 16, holding the handle of the try-square firmly against the working face. Be sure to turn your work toward the light so you can determine accurately whether the square exactly fits the edge.
In testing with the square, some mechanics prefer to hold the material on the level with the eye, as shown in Figure 17. In this position one can see whether light shines under the square blade at any point as it is being pushed along. Push the square from one end to the other so as to test the edge of the material its entire length. If it does not perfectly fit the square, plane down the high edge until it does.

Figure 15.
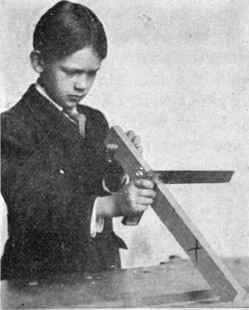
Figure 16.
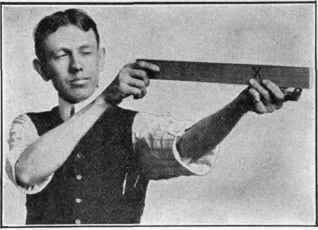
Figure 17.
Also test the edges by sight, as shown in Figure 17, making sure that it is perfectly straight as well as square. You should train your eye so you will be able to determine accurately when an edge is straight, ability to judge lines, angles and measurements by sight is a great advantage to a mechanic. You may also test it with a long steel square, as shown in Figure
18. The edge of the large steel square is a perfect straight line, it can therefore be used to test the accuracy of your planing. When you have made sure that the edge is perfectly straight and square with the working face its entire length, mark this the working edge. This is indicated with two short parallel lines (||).
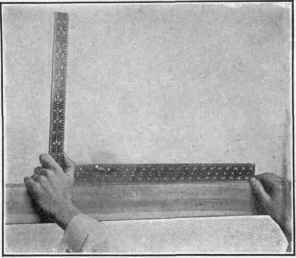
Figure 18.
Continue to:
My Books

