Lesson XXI Slip Mortise And Tenon
Description
This section is from the "Elementary Woodwork" book, by Frank Henry Selden. Also available from Amazon: Elementary Woodwork for Use in Manual Training Classes.
Lesson XXI Slip Mortise And Tenon
Stock and finished sizes are the same as for the halved cross (Lesson 19 (Halved Cross)).
Lay off and work each end as indicated by the drawing (Fig.70)before cutting the piece in two. First set the gauge to 3/8 inch and draw the lines for the side of the mortise, and also the lines for the
Fig. 70. Slip Mortise and Tenon.

side of the tenon which is next the face side. Draw lines across the ends as well as at the sides. Set the gauge to 7/8 inch and draw the lines for the

Fig. 71. Setting a Bit to Bore a Hole.
other side of the tenon and mortise. Measure 19/16 inches from each end and draw the lines for the ends of the tenon and mortise, using a knife and try-square. In drawing the lines for the tenon do not draw across the tenon. In drawing the lines for the inside end of the mortise begin at one edge, drawing a line 1/2 inch long between the gauge lines, and also make a mark at the corner to set the square by in carrying the line around to the other side. Set the square to this mark, and make a similar mark at the opposite corner. Set the square to this mark, and draw the 1/2 inch line at the end of the mortise With the
7/16 inch bit, bore a hole at the inside end of the mortise, boring half way through from each side
(see Figs. 71,
35, and 36), and review what is said about boring in Lesson 9 (Boring). Set
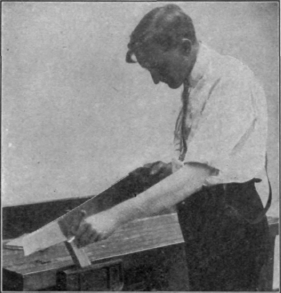

Fig. 72. Ripping Out Waste Material.
Fig. 73. Finishing the Sides of the Mortise. Compare this figure with the next one.
the piece in the vise at an angle and, with the ripsaw, saw down on the inside of the lines, leaving a small amount of material to smooth with the chisel.
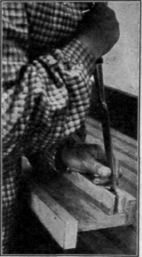
The piece should be so slanted that you begin the cut on the side next to you, and when the saw has cut entirely across the end reverse the piece and saw the other side (Fig. 72). By using this method it is not necessary to watch the line at the back side. Continue to reverse the piece as often as is necessary to avoid cutting any on the side away from you. The tenon may be sawed in the same manner. Lay the piece on the bench-hook and smooth to the center of the lines, as shown in Figs. 73, 66, 53 A, and 53 B. Be very careful not to go beyond the center of the lines, for if you do, the joint will be loose. Use a narrow chisel in testing the sides, as in Fig. 75. To finish the inside end of the mortise use a 3/8 inch chisel, as shown in Fig. 76. The sides of the mortise may be worked with the piece in position, as in Fig. 74.
After you have the joint properly fitted, cut it in two and clamp it as shown in Fig. 77. Notice the little block at the end which keeps the clamp from hitting the end of the tenon. Use another
Fig. 74. Finishing the Mortise.

clamp, as shown in Fig. 78, with a block against the side of the tenon. Next remove the second clamp and place it as shown in Fig. 79. Examine the joint to see if it is tight at
Fig. 75 Testing the Sides of the Mortise with a Narrow Chisel.
Fig. 76. Squaring the Inner End of the Mortise.
Fig. 77. First Clamp on the Slip Mortise and Tenon.


the sides and end, and square at the inside corner. If it proves to be all correct, re-move the clamps and apply the glue. When the glue has dried until it is stringy or cobwebby, place the pieces together and clamp them as before. Apply

the clamps in the same order, leaving only the last clamp on the joint while the glue is drying. Dress the piece to shape and size the same as the halved corner (Lesson 17 (Finishing The Halved Corner)). Sandpaper carefully and finish with two or three coats of shellac.
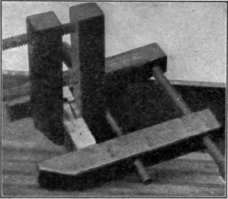
Fig. 78. Second Clamp on the Slip Mortise and Tenon.
Fig. 79. Third Clamp on the Slip Mortise and Tenon.
Continue to:
My Books

