Lesson XVI. Grinding-Tools
Description
This section is from the book "Elementary Woodwork", by George B. Kilbon. Also available from Amazon: Elementary woodwork.
Lesson XVI. Grinding-Tools
The power of sharpening tools is superior to the power of using them; and though a few pupils may acquire it early in their practice of using tools, the majority of grammar pupils will need assistance from the teacher for some time, yet class instruction should be given, and individual practice had. To accomplish this, provide half a dozen cheap 1-in. shank chisels. Have, if possible, at least three grindstones, though one can be made to answer. One reason for mentioning three is that much grinding may be done, and another is that one stone may be kept for each of three varieties of work; viz., a coarse stone for plane blades and wide chisels, where much stock needs to be removed; a finer one for narrow chisels and knife-blades, and a third stone, also fine, for outside ground gouges. The inside ground gouges need an emery-wheel to grind them. Their use, however, in these lessons can be dispensed with.
All three stones may be used for chisels and planes indiscriminately when necessary, if kept trued, but the third stone is mentioned for gouge-grinding, as gouges make such grooves in a stone as to make it exceedingly difficult, if not impossible, for an amateur to use it for planes. For the coarse stone, the quarry at Norwalk, 0., is excellent. For the finer ones, nothing excels Nova Scotia stone.

Fig. 194.
Make a rest to support the chisel-handle or the upper end of a plane-blade while grinding. It will prove a great convenience, as it makes the work easier, expedites it, and insures accuracy. An excellent device for this purpose is shown in Fig. 194, where a chisel is held in position for grinding.
The device is adjustable to hold any length of tool, from the shortest plane-blade to the longest chisel. Fig. 195 is a side view illustrating it more clearly. The rest pivots at A, while a slot and thumb-screw at B on each side give it adjustment and secure it. From a faucet in the copper pail at C, a stream of water of any needed size can be allowed to run. Aqueduct water, if available, will be more convenient. The smaller this stream the better; and, if it can be made to drop instead of run, it will be best. Have a box under the stone to catch waste water, and, if possible, a pipe to conduct from the box to a sewer.
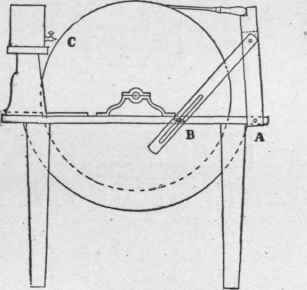
Fig. 195.
Do not hold a tool on a stone in one position continuously, as that tends to wear away the stone at that place, and consequently makes a groove in it. It also tends to make the edge of the tool irregular by its conforming to the irregularities of the stone. Keep the tool moving slowly to the right and left, as shown by dotted lines in the plan view, or diagram, Fig. 196.
A chisel may be swung to right and left, pivoting on the end of the handle at A, where it is supported on the rest; but a plane-blade needs to be moved bodily, as shown by dotted lines, Fig. 197.
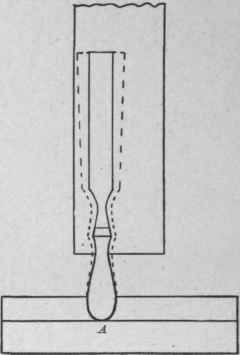
Fig. 196.
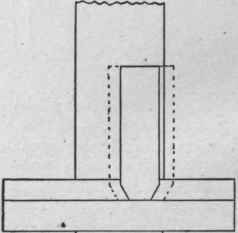
Fig. 197.
There is a natural tendency to use the middle of the face of a stone, as in the plan view, or diagram, Fig. 198.
The result of this is that most any stone in use will be found to have a hollowed face, as in the elevation, Fig. 199.
Fig. 198.
Fig. 199.
To obviate this as much as possible, always use the portion near one edge, as in Fig. 196 or 197, when you can.
In the process of grinding, particles of steel worn off from the tool fill the pores of the stone, and its surface becomes glossed so that it will not cut the tool readily. This will happen to any grindstone after an hour's constant use, and must be scraped off. as in Fig. 200, using for the purpose a bar of soft iron, preferably 1 in. X 3/16 in. It will seem strange to the uninitiated that a bar of soft iron should be used for this purpose instead of steel, but such is the fact.
Not more than two or three minutes are needed for this duty, and it is surprising to note the difference in the cutting quality of the stone before and after the scraping.
When the face of a stone becomes so much out of true that a plane-blade cannot be ground on it, it must be trued either by means of a piece of flat-iron or gas-pipe handled by a skilful operator in a manner similar to Fig. 200, or preferably by means of some one of the truing devices which can be purchased and kept for the purpose.
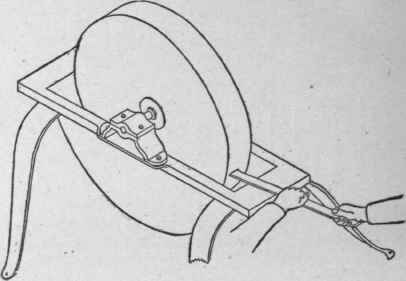
Fig. 200.
The form of the edge of different planes has been shown at Figs. 84 and 85.
The edge of a chisel should be ground straight as from a to b in Fig. 201.
After properly grinding a tool, put a smoother edge on it by means of an oilstone. For common wood-working tools the article known as "Washita Stone" is excellent. "Arkansas Stone" is more expensive, having finer grain. It is specially adapted for small and fine-cutting tools. Fig. 202 is a side view of a chisel resting on a stone as it should in the act of stoning it. Keep the bevel of the tool in contact with the face of the stone, and then so strain the muscles that the front edge a shall be stoned without stoning the rear portion b.
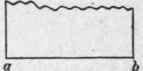
Fig. 201.
Some stoning is necessary with the tool held flat side down, as in Fig. 203. Read also directions in connection with Fig. 48 concerning feather edges which sometimes occur.
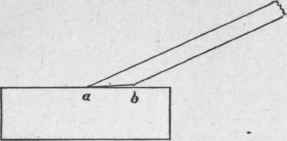
Fig. 202.
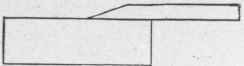
Fig. 203.
Grinding and stoning lessons may be given to sections of the class at any convenient time or times during the course of lessons.
After one of the cheap chisels mentioned has been put in good cutting order by a pupil, by grinding and oilstoning, it may be purposely dulled by striking the edge a few times with the peen hammer, and another pupil can then take a lesson in grinding it. After such nicking, whether purposely or accidentally done, place the chisel in a vertical position on the stone, as in Fig. 204, and grind the nicks out, then grind as in Fig. 194 to produce a new edge. Pupils who succeed with this experimental grinding can be trusted to put the regular tools in order when necessary.

Fig. 204.
There is the same natural tendency to use the middle portion of the face of an oilstone as of the grindstone, and the same constant endeavor is therefore needed to use portions near the ends and edges. When the surface of an oilstone becomes so untrue that planes cannot be stoned on it, tack a piece of No. 1 1/2 sand-paper on a trued board, lay the oilstone on it face downward, and slide it in circular movements till it is sanded true. Time will be needed for this duty, and if the oilstone is much worn, several sheets of paper will be used.
A contrivance better than the sand-paper is a planed iron plate 12 in. square by 3/4 in. thick. Put half a thimbleful of No. 90 emery on this plate, place the oilstone on it, and slide it with circular movements till the emery ceases to cut, which can be known by the sound, and then clean off the dust produced, and put on more emery. Each application of emery and grinding with it will occupy a moment or two, and the complete truing of the stone will occupy from fifteen minutes to an hour according to the amount of grinding needed.
To grind a knife requires more skill than to grind a chisel or plane, because its narrow blade furnishes so little convenience to rest it accurately.
In grinding it, let but a small portion of the length of the blade be in contact with the stone at a time, as in the front view, Fig. 205, but keep the knife constantly moving back and forth in the direction of its length, as indicated by the dotted lines.
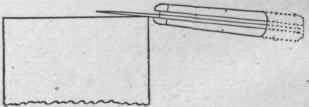
Fig. 205.
The position Fig. 205 applies to grinding the straight portion of the blade, that is from a to b, Fig. 206.
Fig. 206.
To grind the portion of the blade from b to c, hold it on the stone as in Fig. 207, giving it a continuous longitudinal and rocking motion, necessitated by its shape.
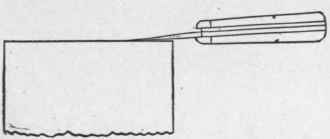
Fig. 207.
For directions concerning oilstoning the knife, see in connection with Figs. 46 to 48.
It will be noticed that the foregoing lessons give practice in using every tool or class of tools in the set enumerated, under the head of Equipment, pages 5 and 6, and, if thoroughly mastered, they will insure a complete elementary knowledge of hand woodwork, enabling an interested student to manufacture any simple article by applying the principles learned.
Continue to:
My Books

