Making Marionettes
Description
This section is from the book "Time Out for Living", by Ernest DeAlton Partridge and Catherine Mooney. Also available from Amazon: Time Out for Living.
Making Marionettes
How To Make The Marionette's Head
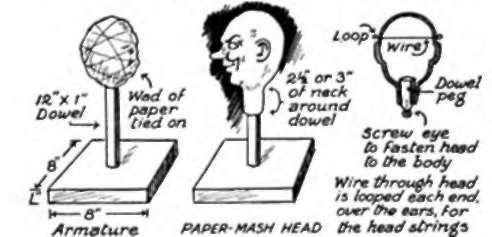
One of the first things to do when making marionettes is to build a stand upon which the head is molded. This stand is known as the armature, and is made from a one-by-eight-inch plank four feet long. Cut the four-foot plank into six eight-inch squares. In the center of each of these, bore a hole with a one-inch bit. Cut the dowel into one-foot lengths. Old broomsticks will serve the purpose very well, if you can find enough of them, but it may be necessary to use a different-sized bit on them. You can determine what bit you need by measuring the broomstick.
Glue one end of the dowel into one of the holes in the six square boards. You will then have an armature that looks like the one in the accompanying illustration.
You are now ready to prepare the mash from which the head is molded. This mash is made from old newspapers and wallpaper paste. Here are the directions for making a head the size of those shown in the accompanying pictures. If you wish to make more heads, you can increase the proportions given here.
Soak three large double sheets of crumbled newspaper for at least twenty-four hours in just enough water to cover the paper. Then rub the paper between the palms of your hands, keeping it under water until you have rubbed it into a very fine pulp. Be sure there are no pieces of paper that have not been thoroughly rubbed in this fashion. Now pour the whole thing into a muslin sack. An old flour sack is excellent for this purpose. If a flour sack is not handy, make a sack from two thicknesses of cheesecloth. Press the sack gently with the fingers, to drain off the excess water and keep the mash from lumping.
Now add one part of wallpaper paste to two parts of paper pulp. The paste is measured after you have added enough water to the paste powder to make a heavy cream. The proportions of paste and paper can be measured accurately enough by judging it by sight; that is, by adding about half as much paste as pulp. When the finished mash is ready, it should feel slightly slippery between the fingers. If it doesn't, more paste should be added. If the mash does not stick together when you model the head, take more paste on your hands and work it into the head at that time.
After you have added the paste to the pulp, put the whole thing into the bag and knead it well until the paste is thoroughly mixed with paper and all excess water has been squeezed out. The mash should now resemble soft clay and be ready for molding.
You are now ready to begin molding the head. On top of one of the armatures you have made, wrap some newspaper into a small round ball. This ball should be a half inch smaller all around than your finished head. Tie it on with light thread. You are now ready to mold mash over this ball into the shape of the head you desire. Before starting, a sketch of the size and features of the head should be handy, and with this sketch as a guide the face is molded into shape. It may take considerable time to mold a satisfactory head because it is essential that you do a good job, since it is the most important part of the whole puppet.
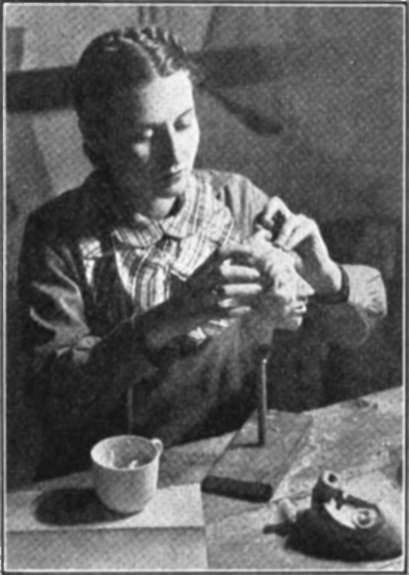
Molding The Head
The features should be more pronounced than in real life. Make the nose, mouth, eyes, cheekbones, and ears stand out.
Our art teacher helped us in molding heads and we also found many good suggestions from books. * Because we worked together in groups, we could help each other and bring in new ideas. Several people made heads of the various characters for Jack and the Beanstalk and then, after they were finished, we voted to see which ones were to be used.
After the heads were molded they were set aside to dry for several days. When they did not dry after three days, we placed them in an oven that was turned low. From sad experience, we found that to put them in the oven too soon shrinks the faces considerably.
When the heads were dry, they were drawn off the armature and the paper inside of the head was removed through the neck by wire hooks or pliers. This left the head hollow and quite light. Small holes were drilled slightly above and behind the ears. The wire was threaded through these holes, and small tight loops were made on either side of the head. A piece of one-inch dowel four inches long was then whittled into a rounded point on one end and a screw-eye was twisted into this point. (See the series of pictures on page 302.) The flat end of the dowel was then inserted into the hole of the neck, glued, covered with more mash, and allowed to set. The dowel forms the neck and the screw-eye is used to fasten the neck to the body.
Making The Puppet
The puppet body was made from the one-by-three-inch pine plank. From the drawing we made on paper, a tracing of the hips and shoulders was made on the pine and cut out with a coping saw. The bottom edge of the hip was beveled, as shown in the diagram. After the hips and shoulders had been cut to the proper size and shape, they were placed on the diagram and joined with muslin by gluing and tacking them along the edge.
The legs were cut out from one-inch dowels into the proper shape. The knee joints were made by cutting slots into the dowels, as shown in the diagram. The upper and lower parts of the legs were joined with a piece of scrap leather. We found that if this knee joint did not fit closely, the legs would bend sideways.
* See the list of books at the end of this chapter.

MAKING A MARIONETTE
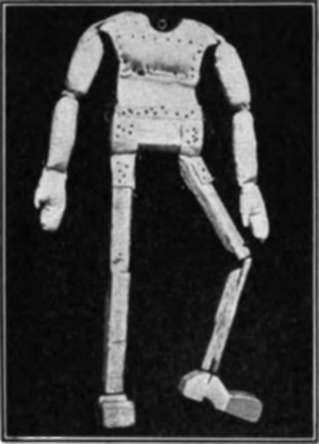
A Simple Marionette
Note how the various joints are fastened together. The arms are muslin filled with cotton. The wrist joints are sewed, while the elbows are tied with string. The knee and ankle joints are leather.
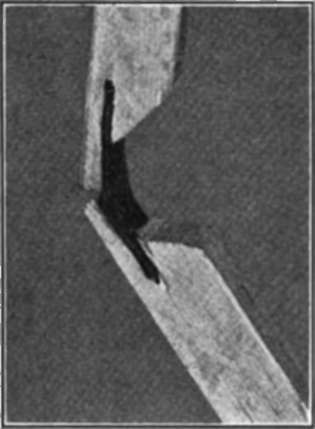
Detail Of Knee Joint
See how the leather hinge holds the joint together.

A More Complex Marionette
The legs are carved to shape and the arms are made of wood. Note the clever carving of the hands.
The top of the leg was beveled in a similar manner to the bottom of the hips (see diagram). The legs were fastened to the hips with a piece of muslin glued and tacked to the hips and legs. It is very important that the two legs be kept the same length.
Shoes were cut out from the board after the side pattern of the shoe had been traced on it. The leather hinge fitted into a slot cut into the bottom of the leg and the top of the shoes. An eighth-inch space was left in here to allow the shoe to move freely.
Arms Were Made From Muslin
After they were sewed, they were stuffed with cotton batting. A row of stitches at the wrists made the wrists flexible, and a soft cotton string tied at the elbow made that joint. This whole arm was tacked and glued to the shoulder, as you will see from the diagram. We were careful to see that the thumbs were to the front before the arms were fastened to the body.
The head was fastened to the body by a screw-eye in the top curve of the shoulder piece linked into the one on the neck, as shown in the drawing on page 305. By opening the one screw-eye, the other could be inserted. Then the first screw-eye was closed and the joint made fast. The puppet was now ready for painting and costuming.
In painting the puppet, it is well to remember you are painting for general effect. Irregular details do not show from a distance. The paint on the face of the puppet is applied like theatrical make-up. The basic complexion color is made by adding yellow and red to white in varying proportions until the desired tone is achieved. For young people, the color should be rich; for old persons, a little blue is added. The hollows in the face, under the eyes, should be shaded slightly. Outline the eyes with black. Shellac on the lips will make them shine.
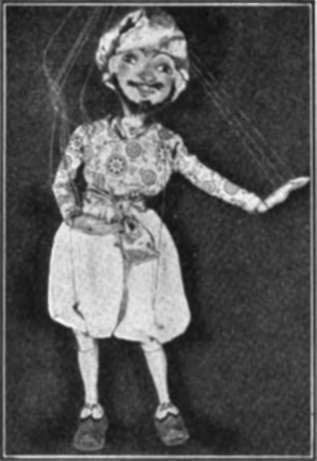
Ali Baba, without the Forty Thieves.
Costumes are important, our group decided, and should be made strictly according to the period they represent. The clothes must be free around the joints, so that the puppets can move freely. Our materials for costumes when the puppet is on the stage and the operator is standing on the bridge back of the stage. The bridge is the place where the puppeteers stand while working the puppets. It is behind the back curtain and it is usually slightly higher than the stage. To attach the strings to the marionette, hammer a tack halfway in the marionette, tie the string on, and then sink the tack clear in. The control, or frame upon which the strings are arranged varied in color and texture, but were not so heavy as to obscure the form of the puppet. We had saved old scraps of cloth until the day when they were needed and they came in very handy.

How to Attach the Strings. The strings that guide the movements of the puppet are arranged in several different ways. A simple and practical method is shown here. The strings should be just long enough to reach the waist of the puppeteer for handling, is parallel with the floor. The head and back strings of the puppet should be taut, while those on the hands and knees are slack. Study the diagram on page 308.
In the production of Jack and the Beanstalk, instead of making a large puppet for the giant, a six-year-old boy was used. He was dressed in a wig and beard, and alongside the puppets he added life to the show. You might try this same thing if you put on Gulliver's Travels.
As you can imagine, we had a great time making these puppets, and if I do say it myself, some of them were certainly good. You will no doubt be interested in learning how the other crews made out with their jobs. Let me tell you later how the scenery and props committee solved its problem.
Some Interesting Things To Do
1. Do you like the version of Jack and the Beanstalk that Chuck and his friends worked out? If not, where would you change or add to the script?
2. Make a puppet of your favorite character - one in history, literature, music, science, or modern life.
3. Sketch a design for a head of your favorite marionette.
Helpful References
Ackley, E. F., How to Make Marionettes. Ransome, G. G., Puppets and Shadows. Green, D. S., Puppet Making. Sarg, T., How to Make and Operate a Kniffin, H. R., Masks. Marionette Theater.
McPharlin, P. L., Puppet Heads and Their Making.
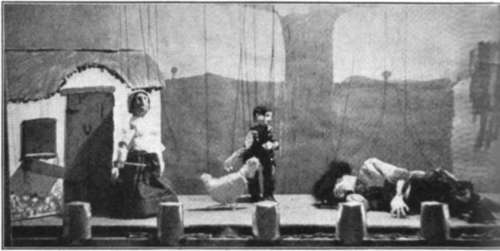
"The giant is dead!"
Continue to:
My Books

