Tilt Or See-Saw
Description
This section is from the book "Woodworking For Beginners: A Manual for Amateurs", by Charles G. Wheeler. Also available from Amazon: Woodworking For Beginners.
Tilt Or See-Saw
One of small size is shown in Fig. 197. The exact proportions given are not necessary, provided you make it strong and so that it will not tip over.
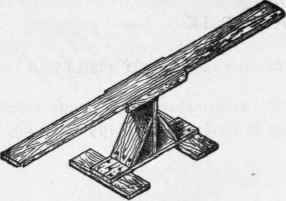
Fig. 197.

Fig. 198.
Before beginning work read carefully Marking, Rule, Square, Sa7t>, Nailing, in Part V., and look up any other references.
First make the standard (Fig. 198) of any sound plank 1 1/4" to 2" thick and 12" or more in width. Get out the pieces to the dimensions before beginning to put together, the ends of the braces H being cut at a mitre (see Mitring). Square the line EF across the plank B at the middle (Fig. 199). Drive three or four stout wire nails (3" to 4" long, according to the thickness of the plank) nearly through the plank on this line. Stand the piece A on end under these nails and drive them through firmly into it (Fig. 200), keeping the two boards at right angles. Bore holes with a 1/4" bit (see Boring) in each end of the pieces H, as shown, taking pains not to get them too near the edge. Screw these braces in place with screws from 2 1/4" to 3 1/4" long (according to the thickness of the plank), keeping the piece A at right angles with the plank B (see Screivs). Screw this frame on the cross-pieces C and D, as shown. Nails can be used throughout, but screws are better. With plane, drawknife, or spokeshave (see Part V. for these tools), round the top edge of A. The tilting-plank should be of spruce, ash, hard pine, or any strong wood, and had best be from 1 1/2" to 2" thick, according to the length, which can be 12' or 14'. It should of course be planed. Next get out a few cleats 7/8" square, or thicker, and screw them on the under side of the tilting-plank at the middle (Fig. 201, which shows the under side of the plank), so that the spaces between them will be a little wider than the thickness of the upright piece A - just enough to allow the plank to tilt freely. Nail strips on the edge, to keep the plank from slipping off sideways, shaving a little from the edges of A at the top if necessary. Finally run over the edges with a plane
(see Plane), and sandpaper the plank to prevent slivers.
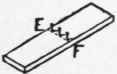
Fig. 199.

Fig. 200.
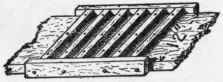
Fig. 201.

Fig. 202.
Simply paint or oil and varnish (see Painting or Finishing).
A larger and more elaborate affair, adjustable to different heights, is shown in Fig. 202.
First get out the main pieces to the dimensions (Figs. 203, 204, 205). The upright pieces should be mortised into the planks on which they rest (Fig. 206) (see Mortising). Gauge a line lengthways along the centre of each side of the uprights (see Gauge) and mark points (say 6" apart) on these lines for holes for the iron rod on which the tilting-plank rests, taking pains to place them alike on the two uprights. Then bore 3/4" or 1/2" holes (see Boring), according to the size of rod you can get. Next fit the cross bar at the top. This can simply be nailed down or fitted between the uprights (Fig. 207), or made with a shoulder (Fig. 208), which will add to the stiffness of the frame. The rest of the construction of the standard is plain, and similar to that just described.
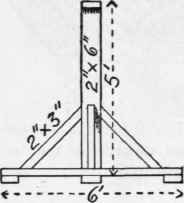
Fig. 203.

Fig. 204.

Fig. 205.
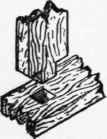
Fig. 206.

Fig. 207.
Fig. 208.
Iron rods can be used for braces, if you wish (Fig. 209).
The tilting-plank should be 16' or 18' long, and of 2" plank. A thread with nut on one end of the iron rod on which the plank rests will keep the rod from slipping out of place. The plank can be fastened to the rod by iron straps or even staples, or a box-like bearing can he quickly made (Fig. 210). Washers can be placed between the plank and the uprights if necessary. Smooth the edges with a plane (see Plane) and sandpaper the plank. Simply paint or oil and varnish (see Painting and Finishing).
Continue to:
My Books

