Finger Plates (Fig. 8)
Description
This section is from the book "Handcraft In Wood And Metal", by John Hooper, Alfred J. Shirley. Also available from Amazon: Handcraft In Wood And Metal.
Finger Plates (Fig. 8)
Object
To introduce various exercises in a complete model, involving manipulation of gouges and grounding tools as special practice for hand and eye.
Note
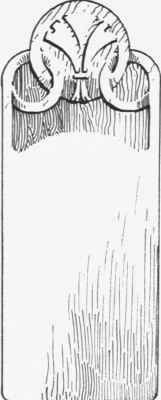
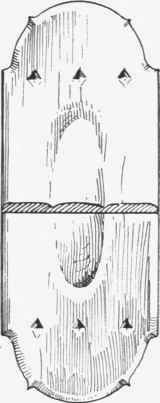
The third, fourth and fifth examples represent those placed beneath the handle and lock of a door, and the length can readily be extended for upper plates. Many alternate arrangements can be effected, such as carving on top of upper plate, and vice versa. When extra length is desired, the ornament is such as to be readily adaptable.
The Process
A full-size drawing of a plate should first be made on cartridge paper, then the wood selected. The following woods are suitable, and range in difficulty of working in the order given, viz. Mahogany, walnut, oak, sycamore, boxwood, ebony, and satinwood.
First Example
1. Cut out and plane to width and thickness:-
English. | Metric. | ||||||||||||
Top plate 1 piece hardwood | 11 | X | 3 | X | 1/4 | in. | base | 28 | X | 7.6 | X | •6 | cm. |
Bottom plate 1 piece „ | 8 | X | 3 | X | 1/4 | in. | 20.3 | X | 7.6 | X | •6 | cm. | |
2. Draw centre line on each piece. Trace half the outline on plate and ornament from drawing.
3. Transfer this on both sides of centre lines with tracing paper.
4. Clamp wood on bench, and outline design with carving gouges.
5. With a grounding-out tool remove interior parts to a uniform depth, keeping corners sharp.
6. Cut the face of the ornament to give an interlacing effect.
7. Complete the model by cutting outline, rounding of same on face side, and sandpaper up the flat surface.
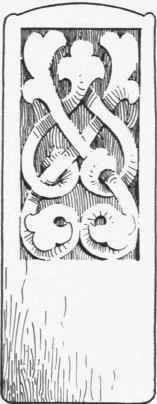
Carving
Carving
TooLing.
Examples of finger plates introducing. vapiovs.decor -ative treat--- ments. • • • inland, carved
Tooled. etc.
Wood Inlay

Stencilling
Fig. 8.
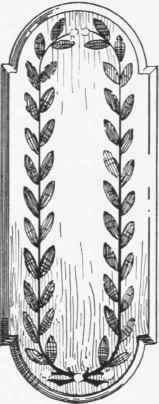
Fourth Example
1. Prepare material (as per above) and transfer detail from drawing with tracing paper.
2. The stems should be cut from veneer, and cut into the groundwork and glued.
3. The leaf units are next cut. They are best made by two gouge cuts in a leaf of veneer, and may be cut into the groundwork in a similar manner. Two gouge cuts are made the required depth, and a slight turn of the tool usually suffices to remove the core.
4. Units are glued in position, holes are bored for the berries with a small twist or centre bit, and a cylindrical stick, equal in diameter to the berry, is prepared, and can be glued into a hole and cut off level with a dovetail saw.
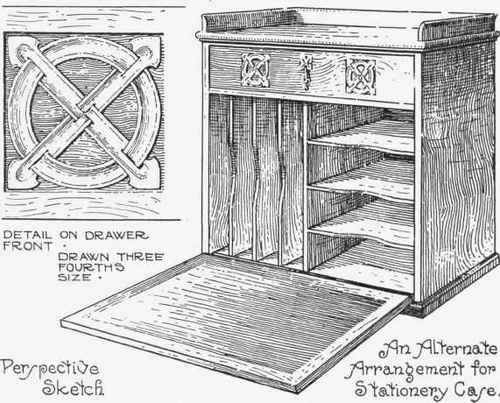
Fig. 9.-A design for a simple carcase model. A stationery case.
Inlaying is further described in chapter on"Decorative Processes".
The ornament shown in the second example should be executed by first outlining the ellipse with gouges, and then bevelling as indicated with flat carving tools.
Continue to:
My Books

